WordPress is the most famous CMS (Content Management System) for Websites in the world
So much so that, in 2022, it is used by about 43% of all websites on the internet,
containing big shots like
- The White House
- Harvard University
- Mozilla
- Sony Music
- Microsoft
- Playstation
- The Walt Disney Company
- cPanel
- Time Magazine
- Spotify
- and more
In this Article, we will be talking about
- What is XAMPP?
- How can we use XAMPP to Develop our WordPress Websites, Completely Free, without Renting a Web Server?
- Installing XAMPP and User Access Control Error
- Setting XAMPP to Always Run as Administrator on Windows
- Downloading WordPress and Getting it Served through our XAMPP Apache Web Server
All in all, setting up your development environment for WordPress
with which you can start developing your Website and create engaging content on the internet.
So, without further ado, let’s get started!
Articles in WordPress For Beginners Series
Develop WordPress Websites locally on your computer using XAMPP Server Stack
What is XAMPP?
XAMPP is a Web Server Solution Stack that contains
- Apache Web Server
- MariaDB – A Fork of MySQL
- PHP
- Perl
‘AMPP‘ in XAMPP is literally the abbreviation for these 4 Technologies
while ‘X‘ stands for it being Cross Platform and available on Windows, Linux and Mac.
XAMPP also contains some other modules like
- FileZilla – FTP Client
- Mercury – Mail Server
- Tomcat – Web Server for Java Based Environment
which can be helpful based on your other development needs.
How can we use XAMPP to Develop our WordPress Websites, Completely Free, without Renting a Web Server?
Now, when developing or making cosmetic changes to the WordPress Websites,
you can either Rent a Web Server from Hosting providers like
and work on these Web Server directly
or you can do so using a Web Server Solution Stack like XAMPP
Now, working directly on the Web Server has the benefit of not having to move files and database later on
when you are ready to launch your website to the public
but it also means that you will have to pay for the web server while getting your website ready,
which some people might not like.
This is where XAMPP can be of help to us
as it contains everything that we will need for WordPress Development i.e. Apache, MySQL & PHP
Using XAMPP, we can develop ours or our clients WordPress Websites directly on our computer
and when it is ready, we can rent a Web Server and move the relevant files to the Web Server.
Installing XAMPP and User Access Control Error on Windows
Now let’s go over the process of Installing XAMPP which is actually pretty simple on Windows
but there are some pop ups that might make you confused as you might not understand what they mean.
First of all we will got to the Apache Friends Website,
which is a Non-Profit behind the XAMPP Project.
Right on the home page, you will find the Download links for XAMPP based on Operating System.
Just Download whichever one is relevant for you.
I’m on Windows, so all the information and images below will be based on it.
After Downloading, just double click on the executable
and if you are on Windows, you will get a pop as shown in the image below
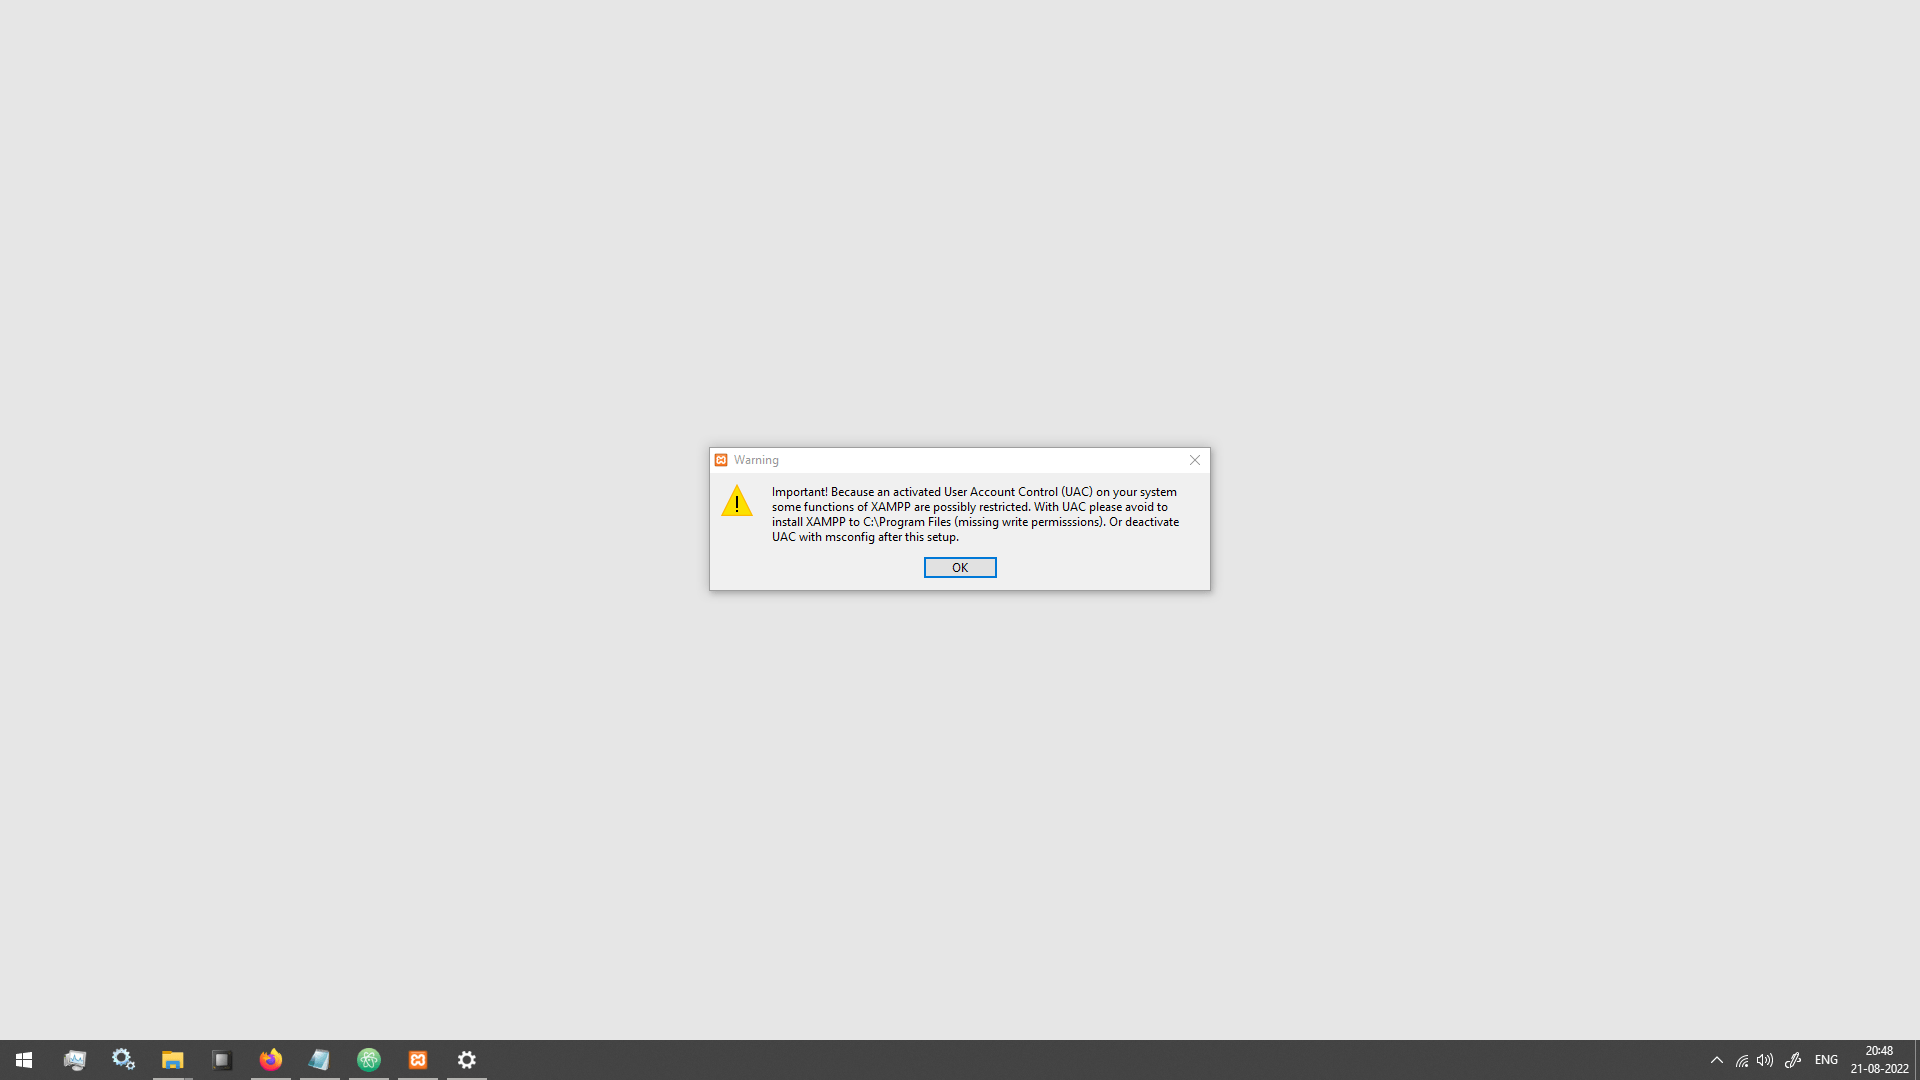
Now, you DO NOT want to disable UAC i.e. User Access Control
as it is an important Security Feature on Windows.
Which means that you will have to install XAMPP in a place other than,
the C: Drive Partition and on whichever Drive Partition your Operating System is installed
With that explained, just click ‘OK’ on the Warning Pop Up and it will open the Setup
Now, all the default settings are fine in the setup
just make sure to change the install location to a partition other than where your OS is installed.
Don’t forget to set the install location to be inside a folder,
Ex. ‘D:/xampp’ instead of ‘D:/’
otherwise it will create a bunch of small folders in your selected location
which you definitely do not want to happen.
and Finally, Uncheck Run XAMPP when the install finishes if you are on Windows
because there is one final step we need to do,
so that we don’t get a bunch of error stating that,
we don’t have permission to change certain config files and such.
With that understood, just follow along with the setup process
and you will have correctly installed XAMPP.
Setting XAMPP to always run as Administrator on Windows
Now, with XAMPP installed, we need to set it up to Always Run as an Administrator.
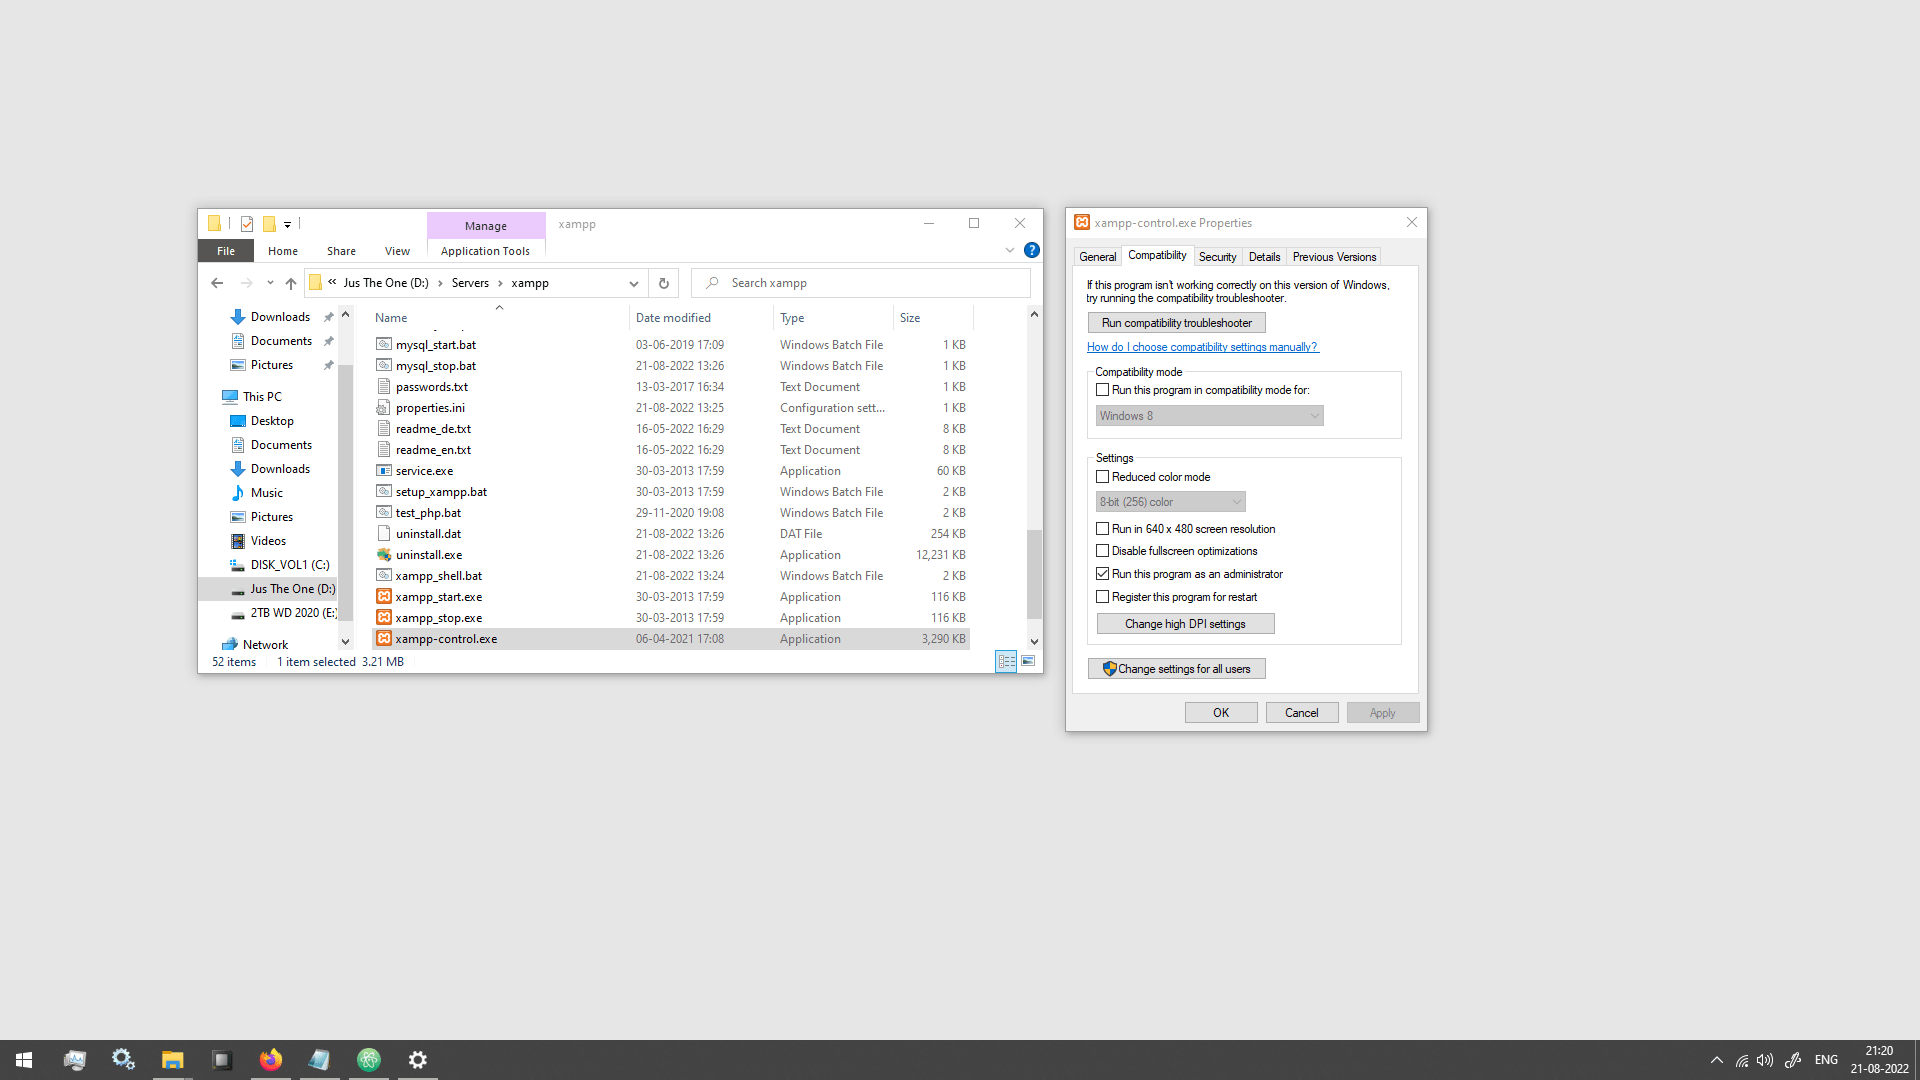
To do that, you will have to Go to the XAMPP Install Location and Right Click on a file named ‘xampp-control.exe’
then in the Context Menu click on Properties
and then in the Compatibility Tab of Properties, enable ‘Run this program as administrator’, as shown in the image below
With that, the installation process in done and we can move on to the WordPress part of this Article.
Downloading WordPress and Getting it Served through our XAMPP Apache Web Server
To Download the WordPress files, you have to go to WordPress.org
Do Not go to WordPress.com, it is a freemium service for Web Hosting.
WordPress is Completely Free and Open Source under GPLv2 and later
So, Files for WordPress are completely free and available to anyone who wants to get them.
All in all, just go to the WordPress.org and Download the latest version of WordPress.
This will download a zip file which will contain everything that we need.
Next, all you need to is to to Go to where you installed XAMPP
and inside the installation folder, you will find a folder named ‘htdocs’
Go inside it and delete everything inside the folder as you don’t need it.
After that create a folder to keep everything organized and name it whatever you want.
Now, Go inside this folder and Extract all the files in the wordpress zip file inside the folder.
That’s it. Now all we need to do is to Open XAMPP
and Start Apache and MySQL as shown in the image below
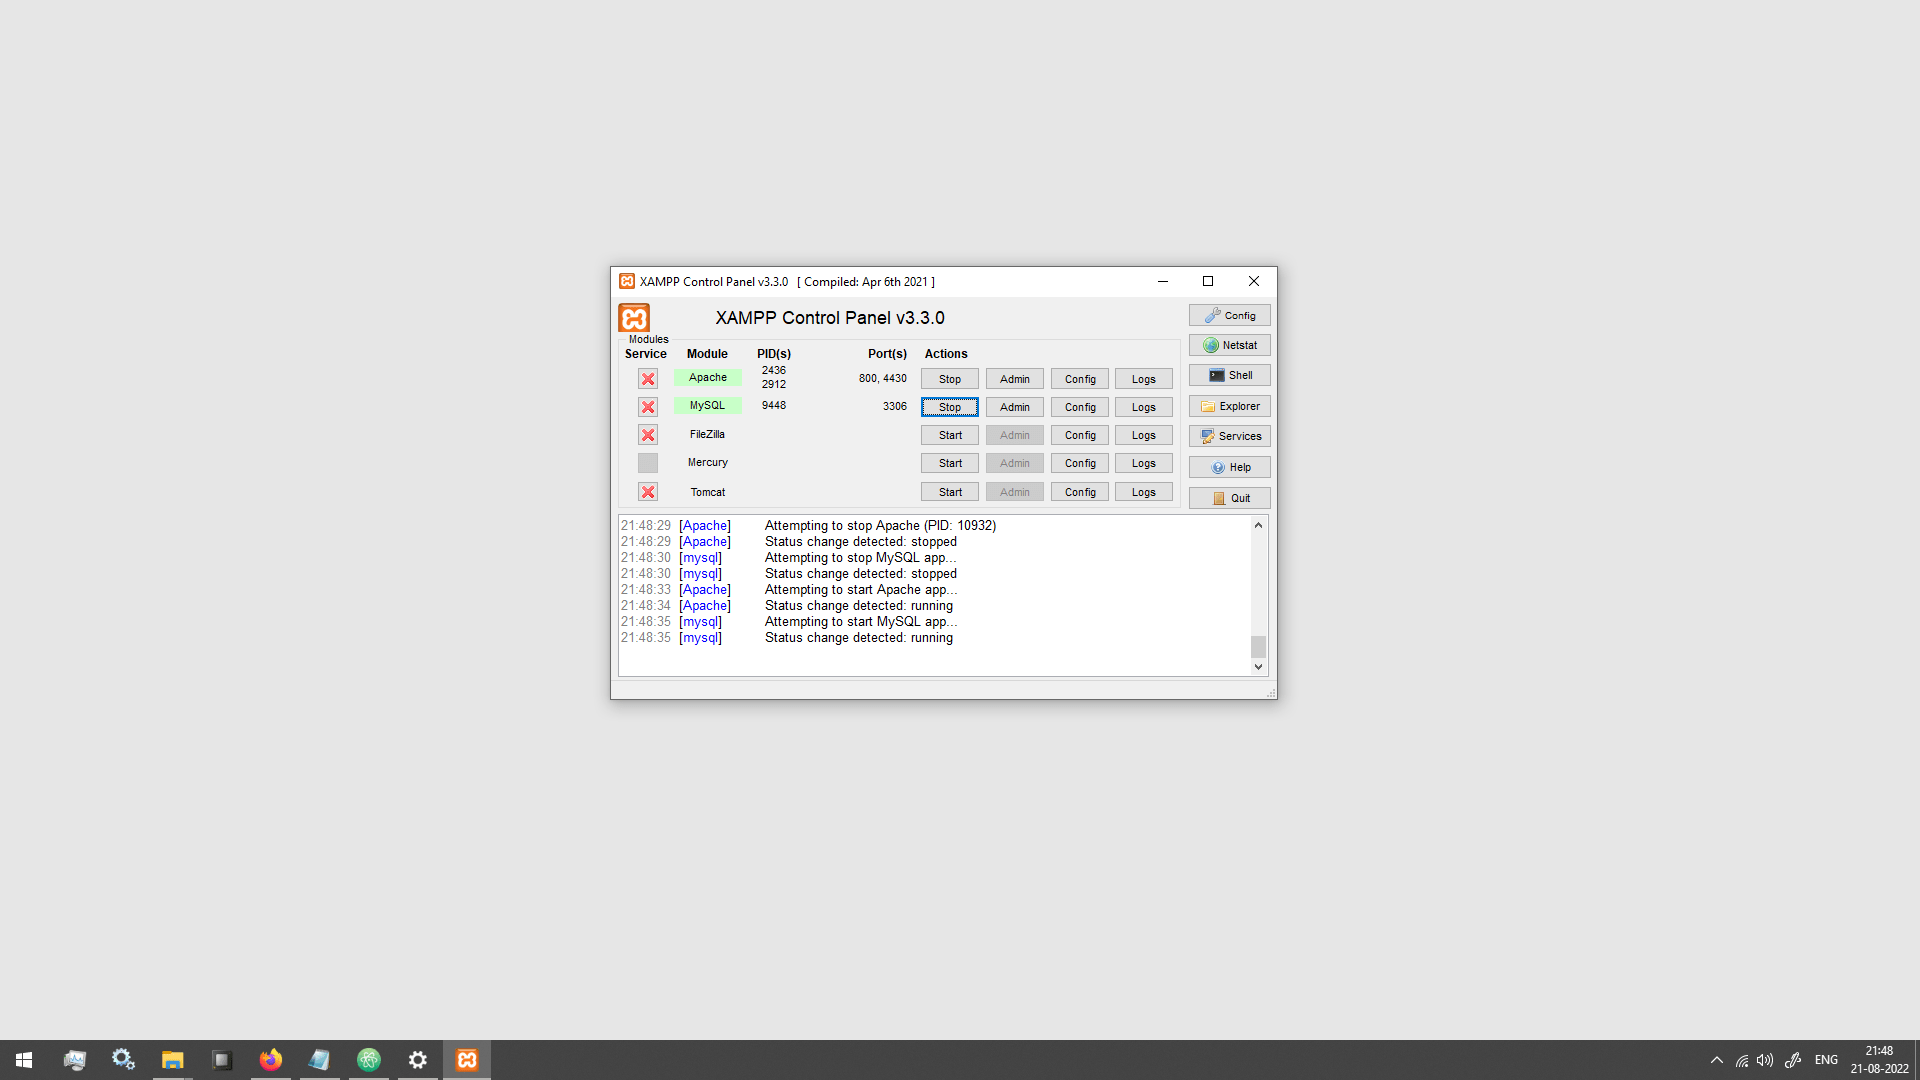
Doing this will start Apache Web Server which will Start Serving all the files inside ‘htdocs’ folder
and it will also start the MySQL Database which WordPress will need to store the Website’s data.
With the Web Server and Database started,
all you need to do is either click on the button saying ‘Admin’ in same line as Apache in XAMPP
or just go to your preferred Web Browser and type ‘localhost:80’
This should open a page that looks something like the image below.
My URL shows ‘localhost:800’ because i changed the port on which Apache is running to 800 from the default port 80.
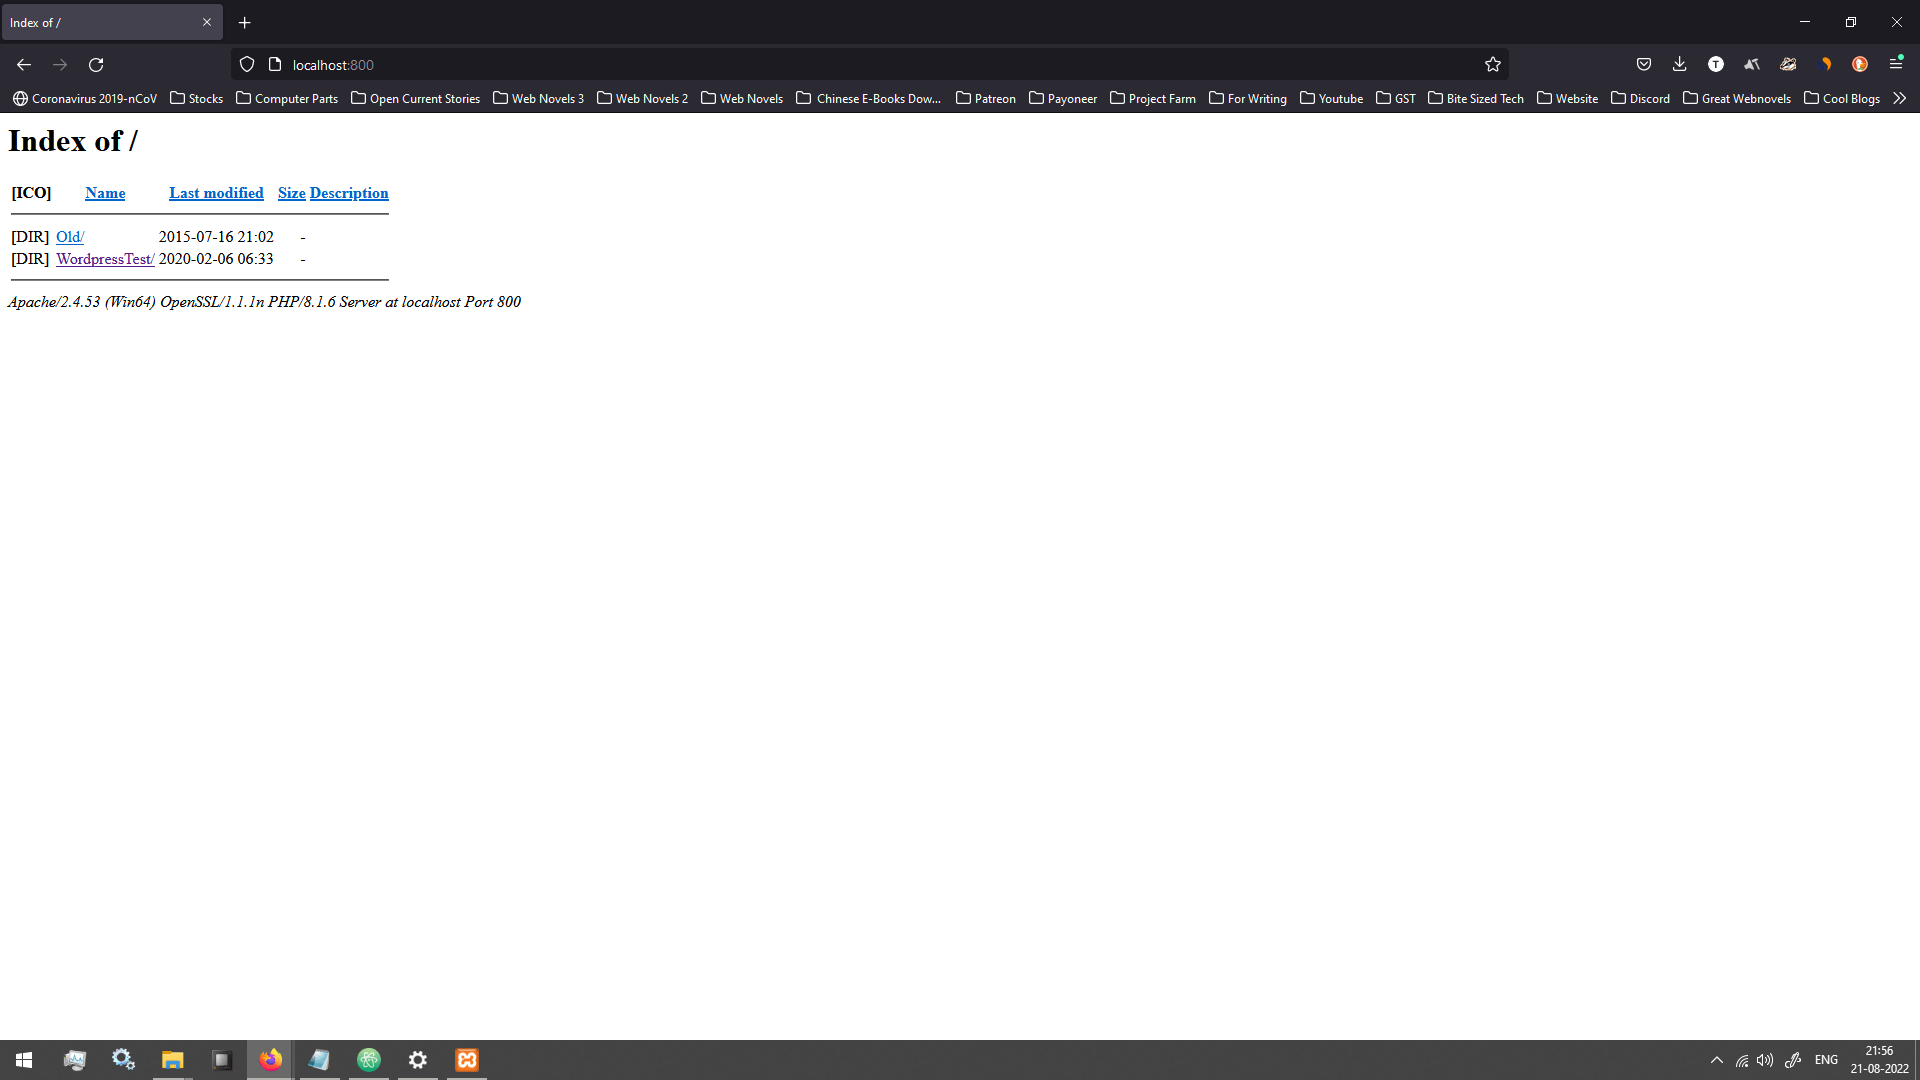
And Finally, just click on the name of the folder in which you extracted the wordpress zip file
and it will open the WordPress Setup Page as shown in image below
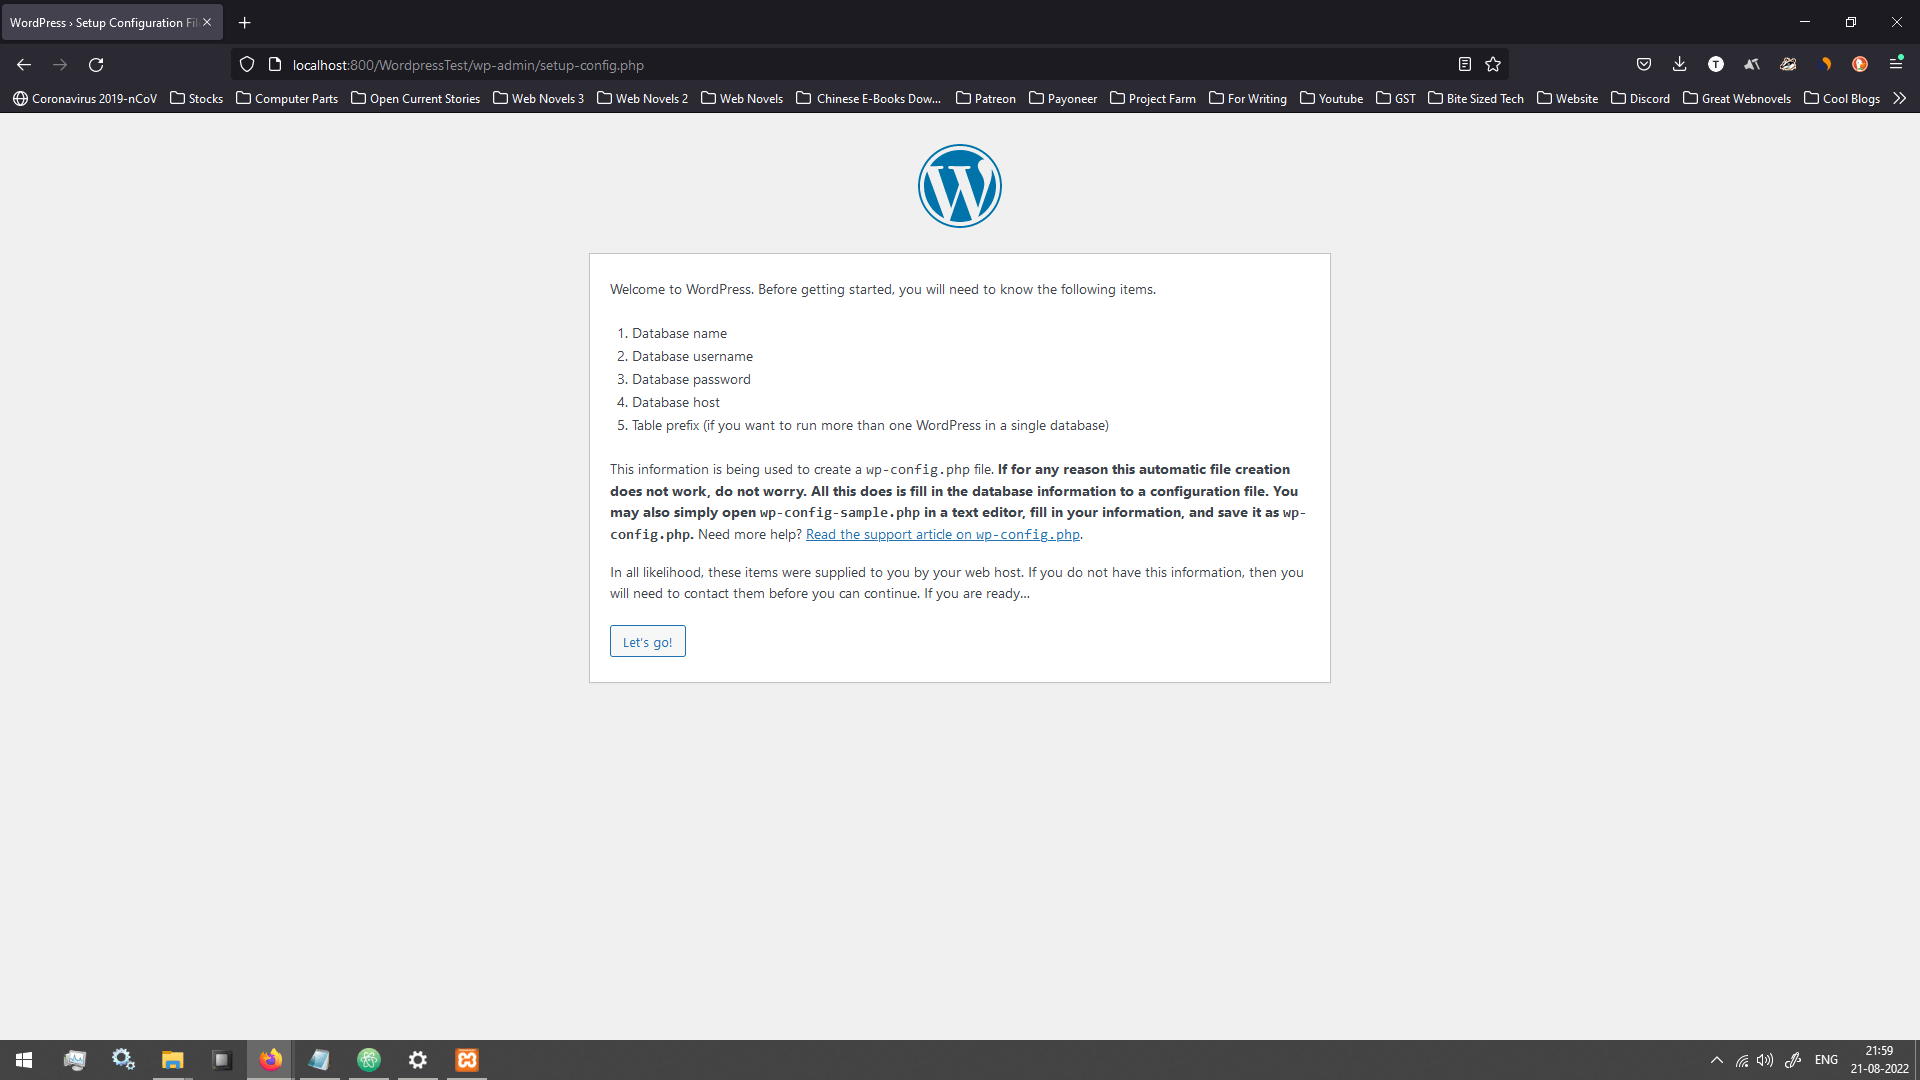
Congratulations! You have successfully installed XAMPP and are Serving WordPress Website Locally using it.
What’s Upcoming In The WordPress For Beginners Article Series
Now, this is not the end but the start of our journey, to get your WordPress Website completely ready
so follow along as in the upcoming articles we will be continuing from here
and going over Creating MySQL Database and Connecting it to WordPress in the WordPress Setup Process,
then Taking a complete tour of WordPress as a CMS (Content Management System),
Talking about What Core Web Vitals are
and How they can Completely Make or Break your Websites online presence on Search Engines like Google
all from someone who’s Website bitesizedtech.com currently has a Core Web Vital Score of
100/100 on Desktop and 99/100 on Mobile.
And again this is just the start,
We will be going over a lot more and will be covering everything from Plugins and Themes
To Base level Website Security using .htaccess file
So, hang on tight and follow along.
Conclusion
Well Folks! That does it for this article.
I hope that the information within this article will be helpful to you, when making your WordPress Websites.
May you have develop an awesome website and have great success in your respective careers!
Goodbye and see you again in the upcoming articles!
Share this post on Social Media platforms, if you think our content is great.
If you like the content and would like to follow us, we are present on the platforms below
Follow Us On Social Media
Goodbye For Now,
This is your host VP
Signing Off.
Articles In WordPress Tutorial For Beginners Series
Develop WordPress Websites locally on your computer using XAMPP Server Stack
Articles In Basics Of Internet Series
Basics Of Websites & How They Work
Basics Of Web Servers | Self Hosted, Shared Hosted, VPS, Dedicated Web Servers
Cloud Hosting Vs Traditional Web Hosting
Articles In Web Development Basics Series
Virtualization, Hypervisors & Virtual Machines (VM)
IP Address and DNS (Domain Name System)
DNS Records | A, AAAA, CNAME, MX, TXT, NS, SOA, SRV, PTR & CAA Records
Articles In Monetizing Websites Series
Understanding Audience Intent Of Your Blog Traffic
Building a Monetization Strategy (Not Uploaded)
Digital Marketing Revenue Models – CPM, CPC, CPA, CPL & CPI
Affiliate Marketing & Monetizing Your Blog Using It. (Not Uploaded)
How is your Ad Inventory Auctioned (Not Uploaded)
Affiliate Marketing and Why it Works. (Not Uploaded)