Rust is a Systems Programming Language which has become famous in the recent years because of it’s
- Low level capabilities,
- Comparable Speed to other Low Level programming language like C, C++
- Excellent Memory Safety
- And all in all the ability Rust gives of being able to write Safe Code using it.
In this Article Series, we will be taking a look at
How we can create a Simple Minimalist Text Editor in Rust Programming Language
so that we can understand the workings of the language
while also developing a complete product that someone can use if they want.
In this Article, we will look at
- Installing Rust Programming Language to your computer
- Updating Rust after it has been Installed
- Uninstalling Rust and Rustup if you so want to
- And Setting Up Visual Studio Code with Extensions for Rust Programming Language
So that even those who are not familiar with programming in general, can follow along without a problem.
I’ll also be posting links to all the articles below so that you can find them easily.
So, without further ado, let’s get started!
This Article is part of Minimalist Text Editor Using Rust and Tauri Tutorial Series
- Setting Up The Development Environment for Rust Programming Language <— You’re Currently Here :p
- Creating The Rust Project Using Cargo and Understanding Rust Project Folder Structure
- Tauri and Reasons For Using It in Our Rust based Minimalist Text Editor
- Understanding Tauri Multi-Process Architecture, Core Process & WebView Process
- Understanding Tauri Inter-Process Communication (IPC) | Events & Commands
- What is Isolation Pattern in Tauri and Why you should be using it
- Security Features and Practices to understand when Developing Applications using Tauri
Step 1 – Installing Rust Programming Language To Your Computer | Rust Tutorial
The first thing that we will need to do is download Rustup from the Official Rust Programming Language Website
(I’ve also linked both the versions below)
Official Download Links for Windows from Rust Website
which will then be used to download and install the required packages.
For Mac OS, Linux, Windows Subsystem for Linux, or other UNIX based operating System,
you can run the following command in the Terminal
curl --proto '=https' --tlsv1.2 -sSf https://sh.rustup.rs | shwhich will download the shell file for Rustup
And then you can follow on with the instructions that you receive to install Rust on your system.
You might need to install cURL if it is not installed on your system.
After you have downloaded and installed Rust using Rustup,
As a final step, you might also be asked to install Visual Studio C++ Build Tools, if it’s not already installed.
You can download the C++ Build Tools from Visual Studio’s Website linked below.
and install it to fulfill that requirement.
With that, you have successfully Downloaded and Installed Rust and all it’s Dependencies
that you needs to develop software using Rust on your computer. (Hooray! :p)
Checking If Rust Has Been Installed Correctly
To check if everything is installed correctly, you can go to your Terminal
which in case of windows is your CMD or Powershell or any other Terminal that you use.
and type the command below
rustc --versionif it prints out the Version Number with an Commit Hash and Commit Date like
rustc 1.61.0 (fe5b13d68 2022-05-18)Then, Rust has been installed correctly on your system.
How to Update Rust Programming Language
To Update Rust in the future, you can go to your Terminal
and type the command below
rustup updateIf there is a newer version, it will update Rust on your system.
How to Uninstall Rust Programming Language
To Uninstall Rust Programming Language from your system, you can go to the Terminal
and type the command below
rustup self uninstallThis will uninstall the Rust Programming Language and Rustup from your System
Step 2 – Setting up Visual Studio Code with Extensions for Rust Programming Language | Rust Tutorial
Now, I personally use VS Code as my Code Editor for Rust and also for any other languages.
But that does not mean Rust is only supported by VS Code.
Rust Programming Language has support in 7 Code Editors and IDEs given below
So, you can choose whichever one you like.
I’ll be moving further thinking that you are using VS Code just like me.
Now, the first thing that you need to do is to Update VS Code
because there is a high chance that you will receive error while installing Extensions otherwise.
You can do this by going to and clicking on Title Bar -> Help -> Check For Updates
Will waiting for VS Code to update, you need to understand why we are installing these extensions,
By Default, VS Code doesn’t support the Rust Programming Language or TOML (Tom’s Obvious Minimal Language), so to get all the
- Code Highlighting
- Code Completion
- IntelliSense
- Debugging Capabilities
- Dependency Version Information
- and more
required for an ideal Software Development experience, we will need to install multiple Extensions / Plugins.
With VS Code updated, we are going to install 5 Extensions / Plugins linked below
Mandatory Extensions
Optional Extensions
Now we don’t need to use the links, i’ve given them only if you want to download the Extension File (.vsix) to your computer.
We will be installing these 5 Extensions directly through the Extensions Tab which you can find on the left side panel in VS Code.
Just go to the Extensions Tab and then in the Search Bar type the Extension Name, click on the appropriate result and install the Extension.
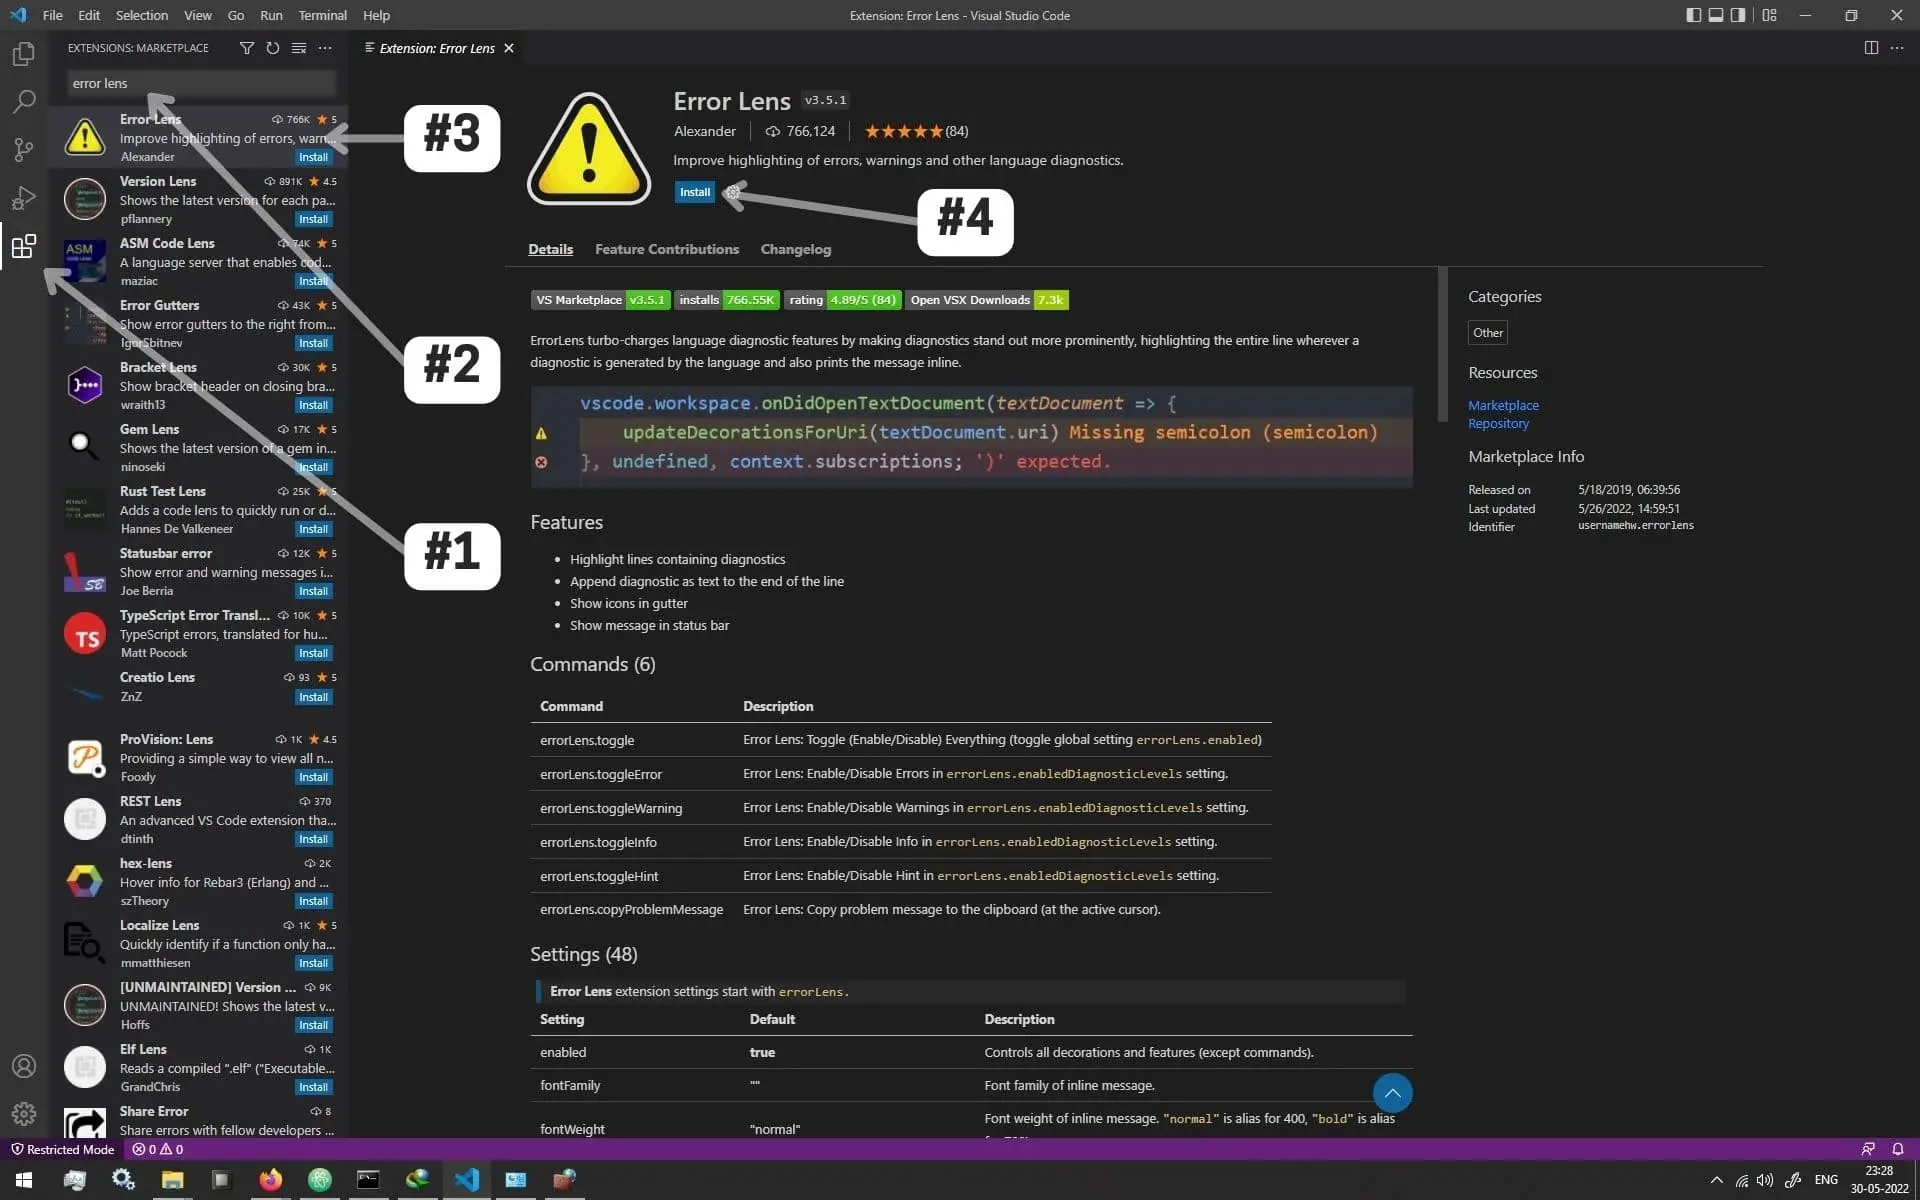
Do this for all the 5 extensions and you my mate are finally ready to start developing software using Rust Programming Language.
This Article is part of Minimalist Text Editor Using Rust and Tauri Tutorial Series
- Setting Up The Development Environment for Rust Programming Language <— You’re Currently Here :p
- Creating The Rust Project Using Cargo and Understanding Rust Project Folder Structure
- Tauri and Reasons For Using It in Our Rust based Minimalist Text Editor
- Understanding Tauri Multi-Process Architecture, Core Process & WebView Process
- Understanding Tauri Inter-Process Communication (IPC) | Events & Commands
- What is Isolation Pattern in Tauri and Why you should be using it
- Security Features and Practices to understand when Developing Applications using Tauri
Conclusion
Well Folks! That does it for this article.
I hope that you found this information useful and that your systems are ready for what’s to come next.
May you have success in your career whatever it may be.
See you again in the upcoming articles!
Share this post on Social Media platforms, if you think our content is great.
If you like the content and would like to follow us, we are present on the platforms below
Follow Us On Social Media
Goodbye For Now,
This is your host VP
Signing Off.
Articles On Minimalist Text Editor Using Rust Programming Language And Tauri
Setting Up The Development Environment for Rust Programming Language
Creating The Rust Project Using Cargo and Understanding Rust Project Folder Structure
Tauri and Reasons For Using It in Our Rust based Minimalist Text Editor
Understanding Tauri Multi-Process Architecture, Core Process & WebView Process
Understanding Tauri Inter-Process Communication (IPC) | Events & Commands
What is Isolation Pattern in Tauri and Why you should be using it
Security Features and Practices to understand when Developing Applications using Tauri