Albedo Maps / Textures or as some might call it Diffuse Maps / Textures are one of the most commonly used items when it comes to computer graphics and 3D Art
In this Article, we will be going over
- What Albedo / Diffuse Maps are
- Why we as 3D Artists and Game Developers use them
- How Albedo Maps are Different from plain old images
- Where you can get your hands on both Paid and CC0 Albedo / Diffuse Maps
- And Finally, How you can use Albedo Maps when working with Blender
So, without further ado, let’s get started!
This Article is part of 3D Art Basics With Blender, which contains
- Overviewing The Basics Of 3D Art | 3D Modeling, UV Unwrapping, Texturing & Rendering
- Color / Albedo Map / Diffuse Map <– You Are Here :p
- Normal Map and Bump Map
- Specular Map / Reflectivity Map (Not Uploaded Yet)
- Metalness Map (Not Uploaded Yet)
- Gloss Map / Roughness Map (Not Uploaded Yet)
- Displacement Map / Height Map (Not Uploaded Yet)
- Ambient Occlusion i.e AO Map (Not Uploaded Yet)
- Channel Mask Map (Not Uploaded Yet)
What is an Albedo Map or Diffuse Map?
So you have your 3D Model complete and have also UV Unwrapped it,
whatever that model may be, you will need to add some sort of color to it.
Now this can of course be just a single color and that may work fine if it suits the art style
but for a lot of applications just a single color will not be enough.
This is where Albedo Maps or Diffuse Maps come in.
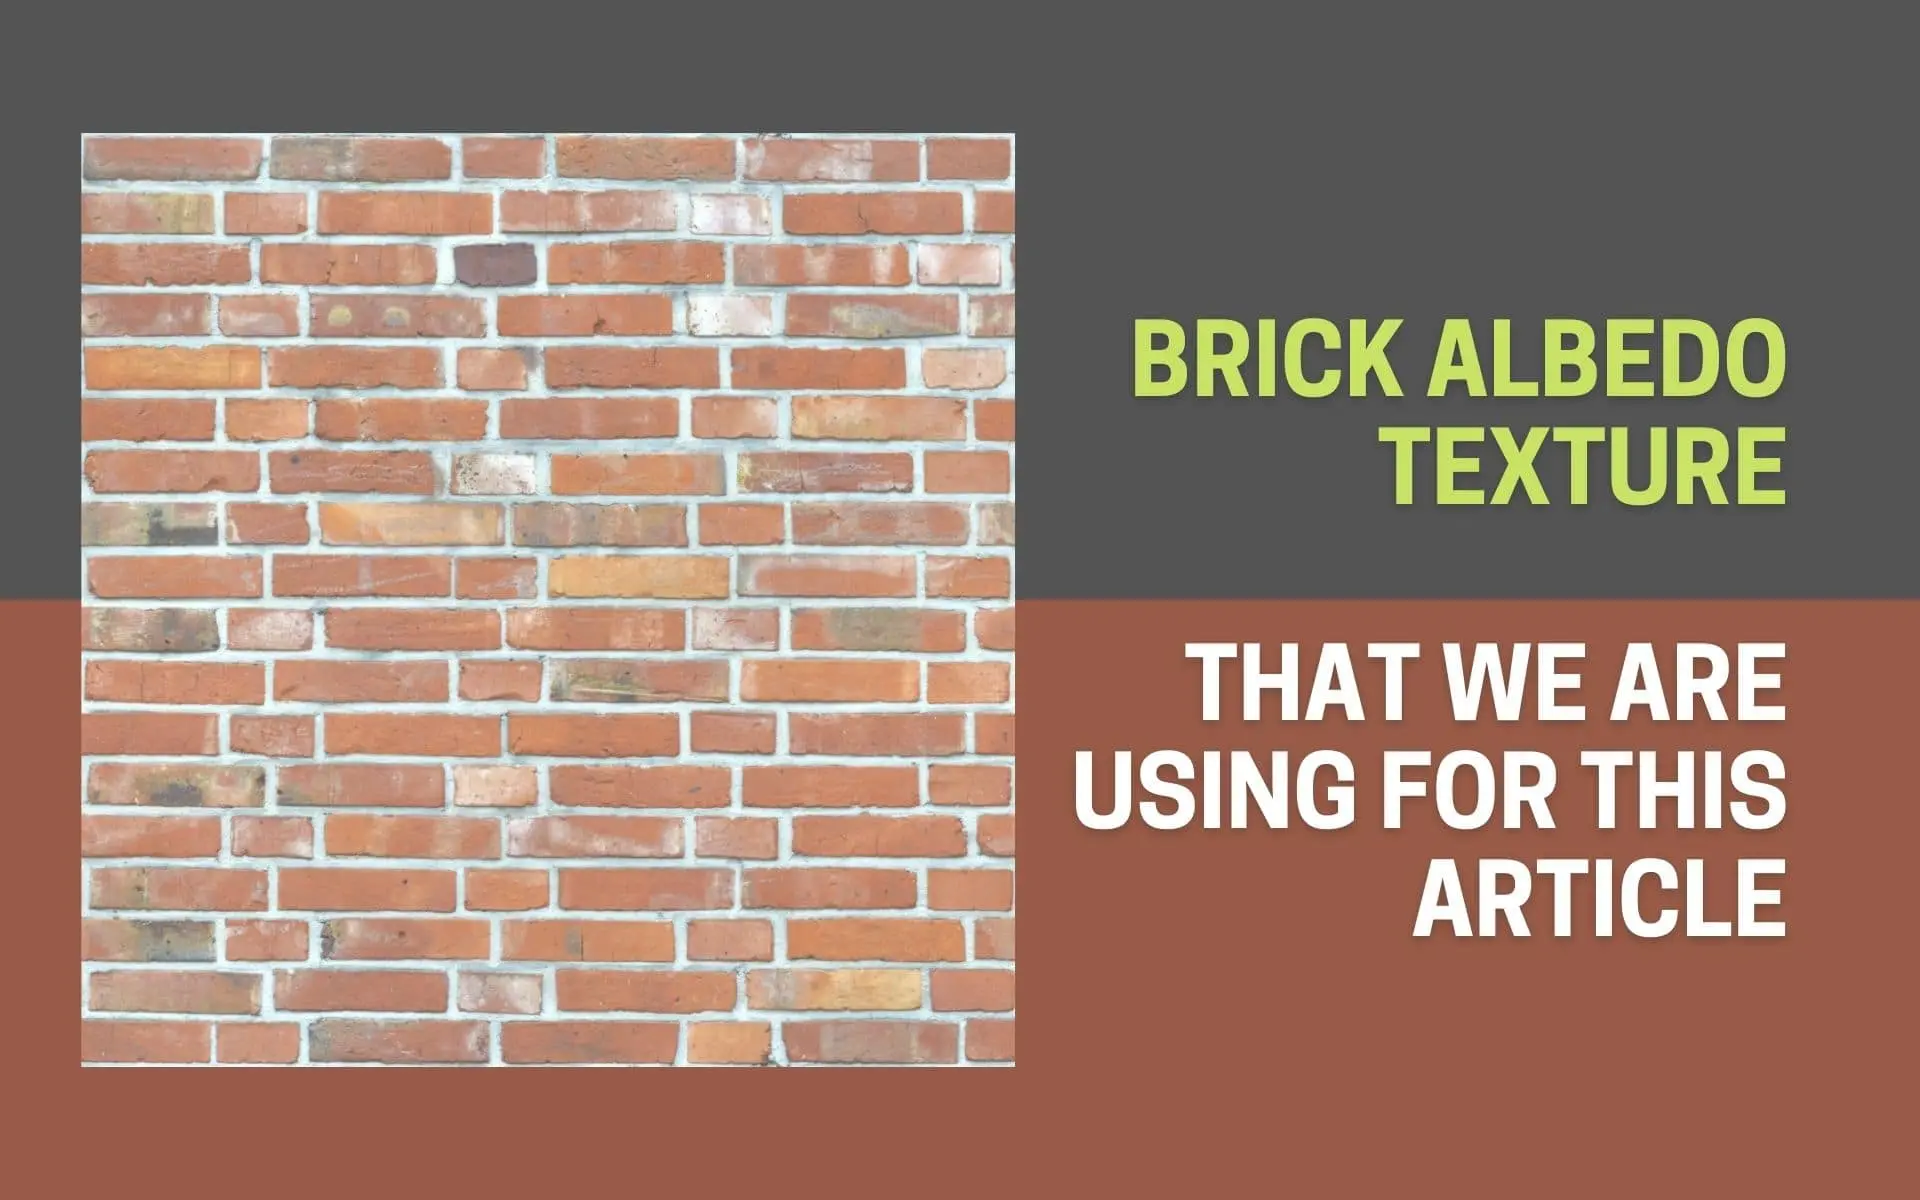
Albedo Maps are literally just images of a certain resolution with one or more Colors on it
which are being shown on the UV Unwrapped faces of the 3D Model.
For Those who don’t know what UV Unwrapping is take a look at this post on What is UV Unwrapping?
If Albedo Maps are just Images can you use any image as an Albedo Map?
Well yes and no.
Yes, because you can indeed use any image as an Albedo Map
But No, because if you just use any image i can be almost certain that it won’t be an Albedo Map.
Confusing isn’t it? :p
Let me explain,
it is true that we can use any image in that Albedo channel when working with Shaders
but the problem is that most of these images will have Shadows and Highlights.
An Albedo Image should not have any Shadows or Highlights in it
because you don’t want the shadows and Highlights on your 3D Model to be static
instead what you want your models shadows and highlights to be affected by the software you are using like Blender, Unreal, Unity, Maya, etc.
You want accurate and realistic lighting based on where you have placed your lights in your 3D scene relative to your 3D Model
and based on the intensity, color, and other properties of the lights in your scene.
So To Sum Up Albedo Maps
Albedo Maps are just Colored Image Textures without any lighting information in it.
We don’t want lighting information because lighting should be added in the 3D Software where you are making your project
So if you are making An Illustration in Blender, lighting will be added in blender.
and if you are making a game in Unity, lighting should be added in Unity.
Where To Get Albedo Maps
While you can make your own Albedo Maps using Gimp, Photoshop, Krita, Clip Studio Paint, etc
it might be a time consuming process to get the details you need just right.
So, instead you can get Albedo Maps / Textures from a lot of places on the internet.
Just Make sure you check the licensing terms before using them in your projects.
I’ll link some good websites below for both paid and CC0 Textures.
Using Albedo Textures in Blender
Now let’s see how you can use the Albedo Maps / Textures in your Blender Project
whether you made those textures yourself or got them from the internet.
Considering that you have already 3D Modeled and UV Unwrapped your 3D Model
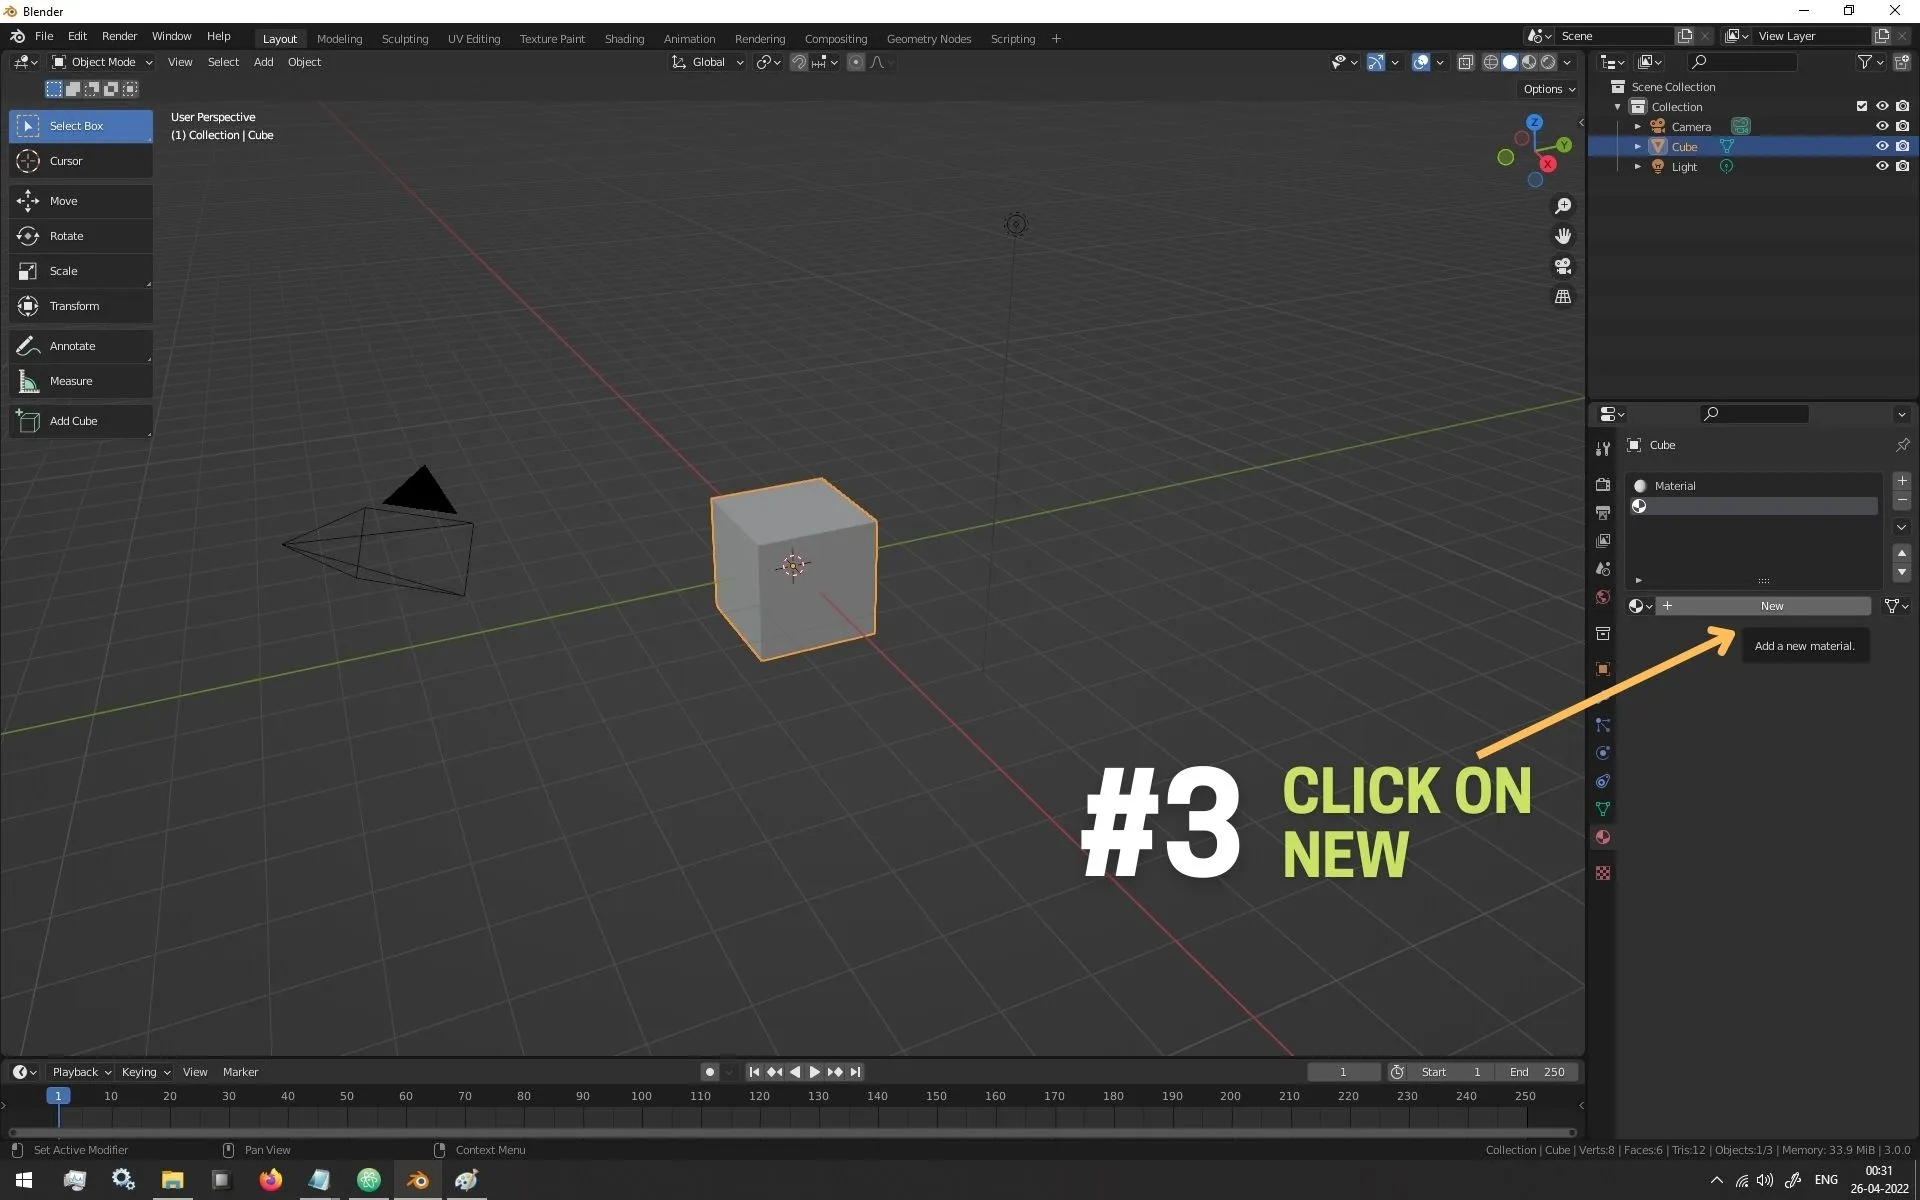
The first thing you need to do is create a new Material for your 3D Model
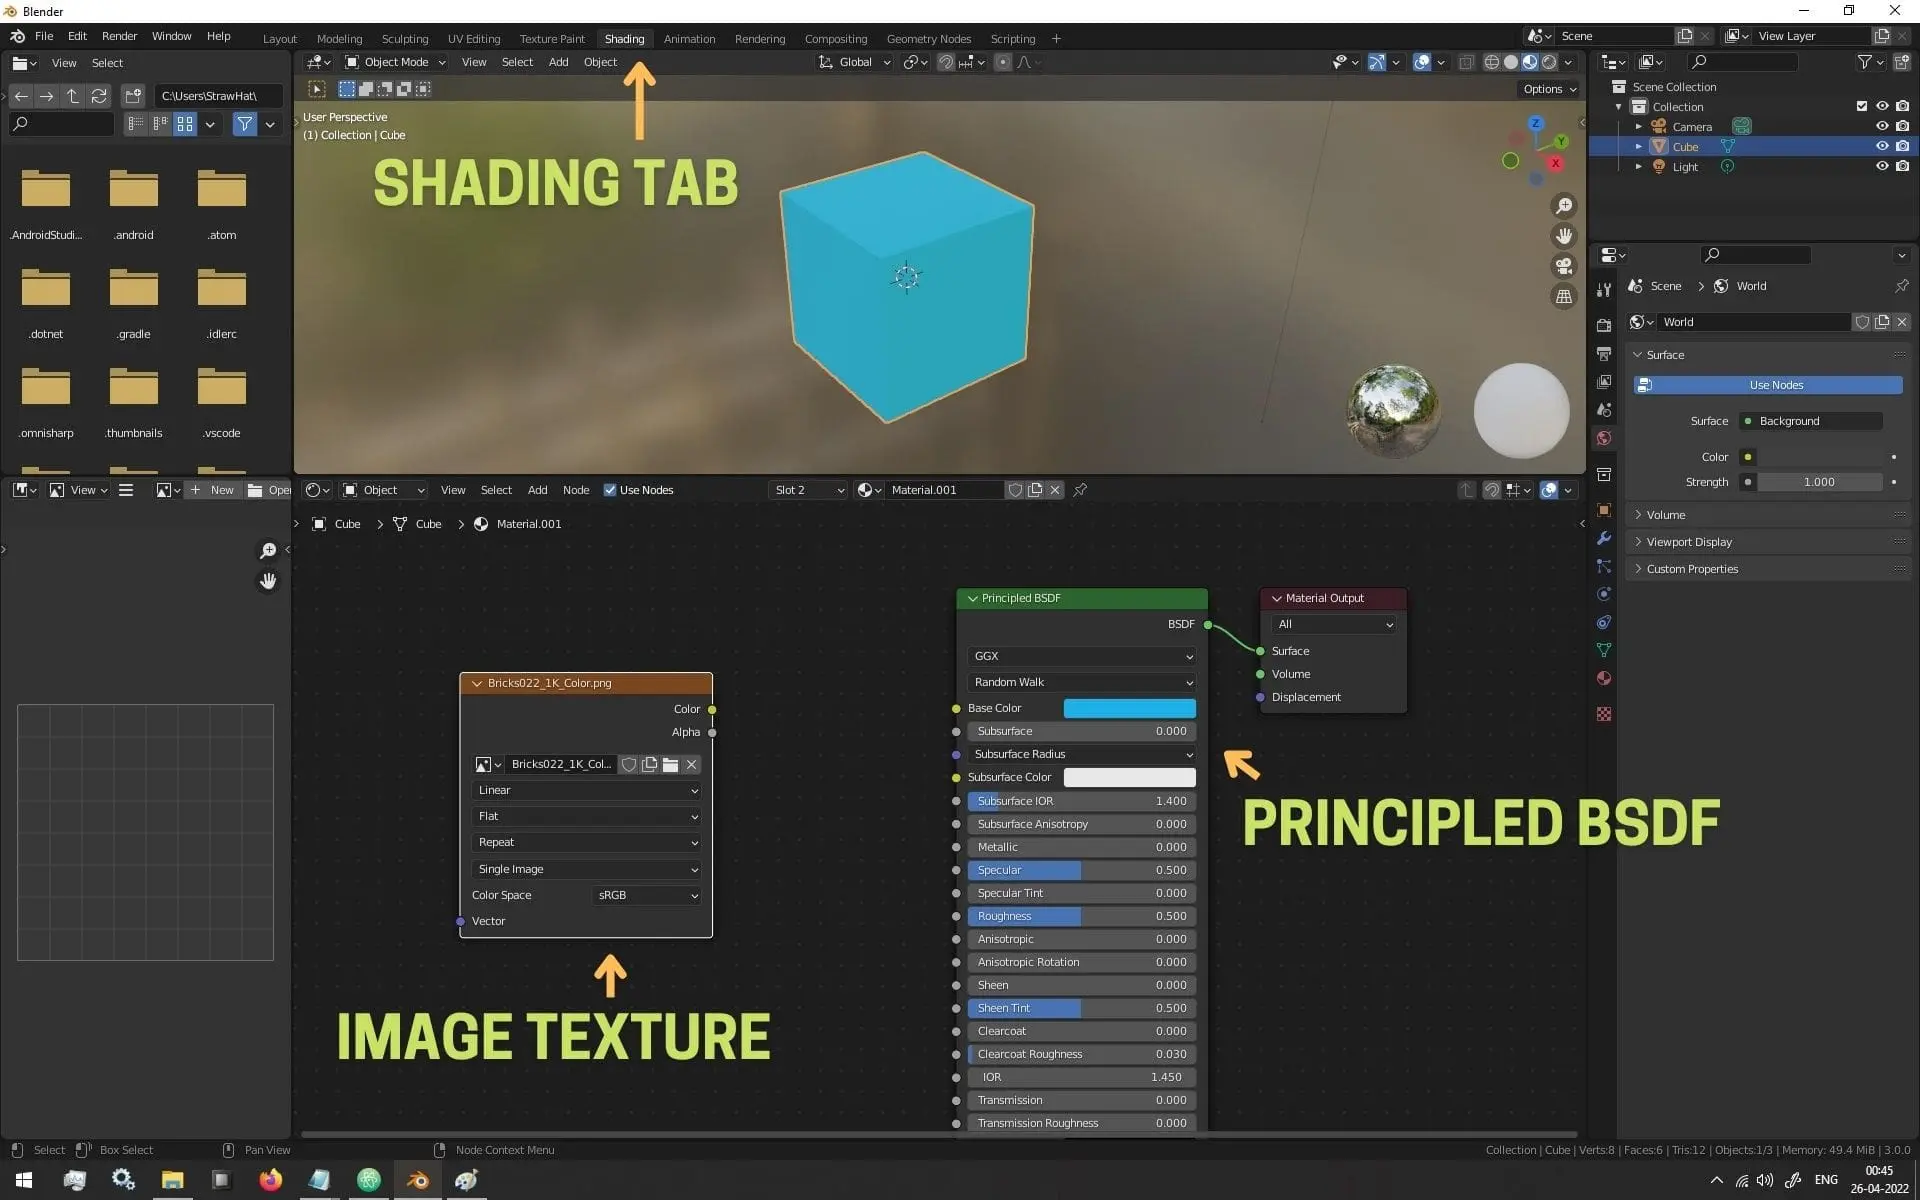
Creating A New Material For Our Albedo Texture
You can do this as shown in the images below.
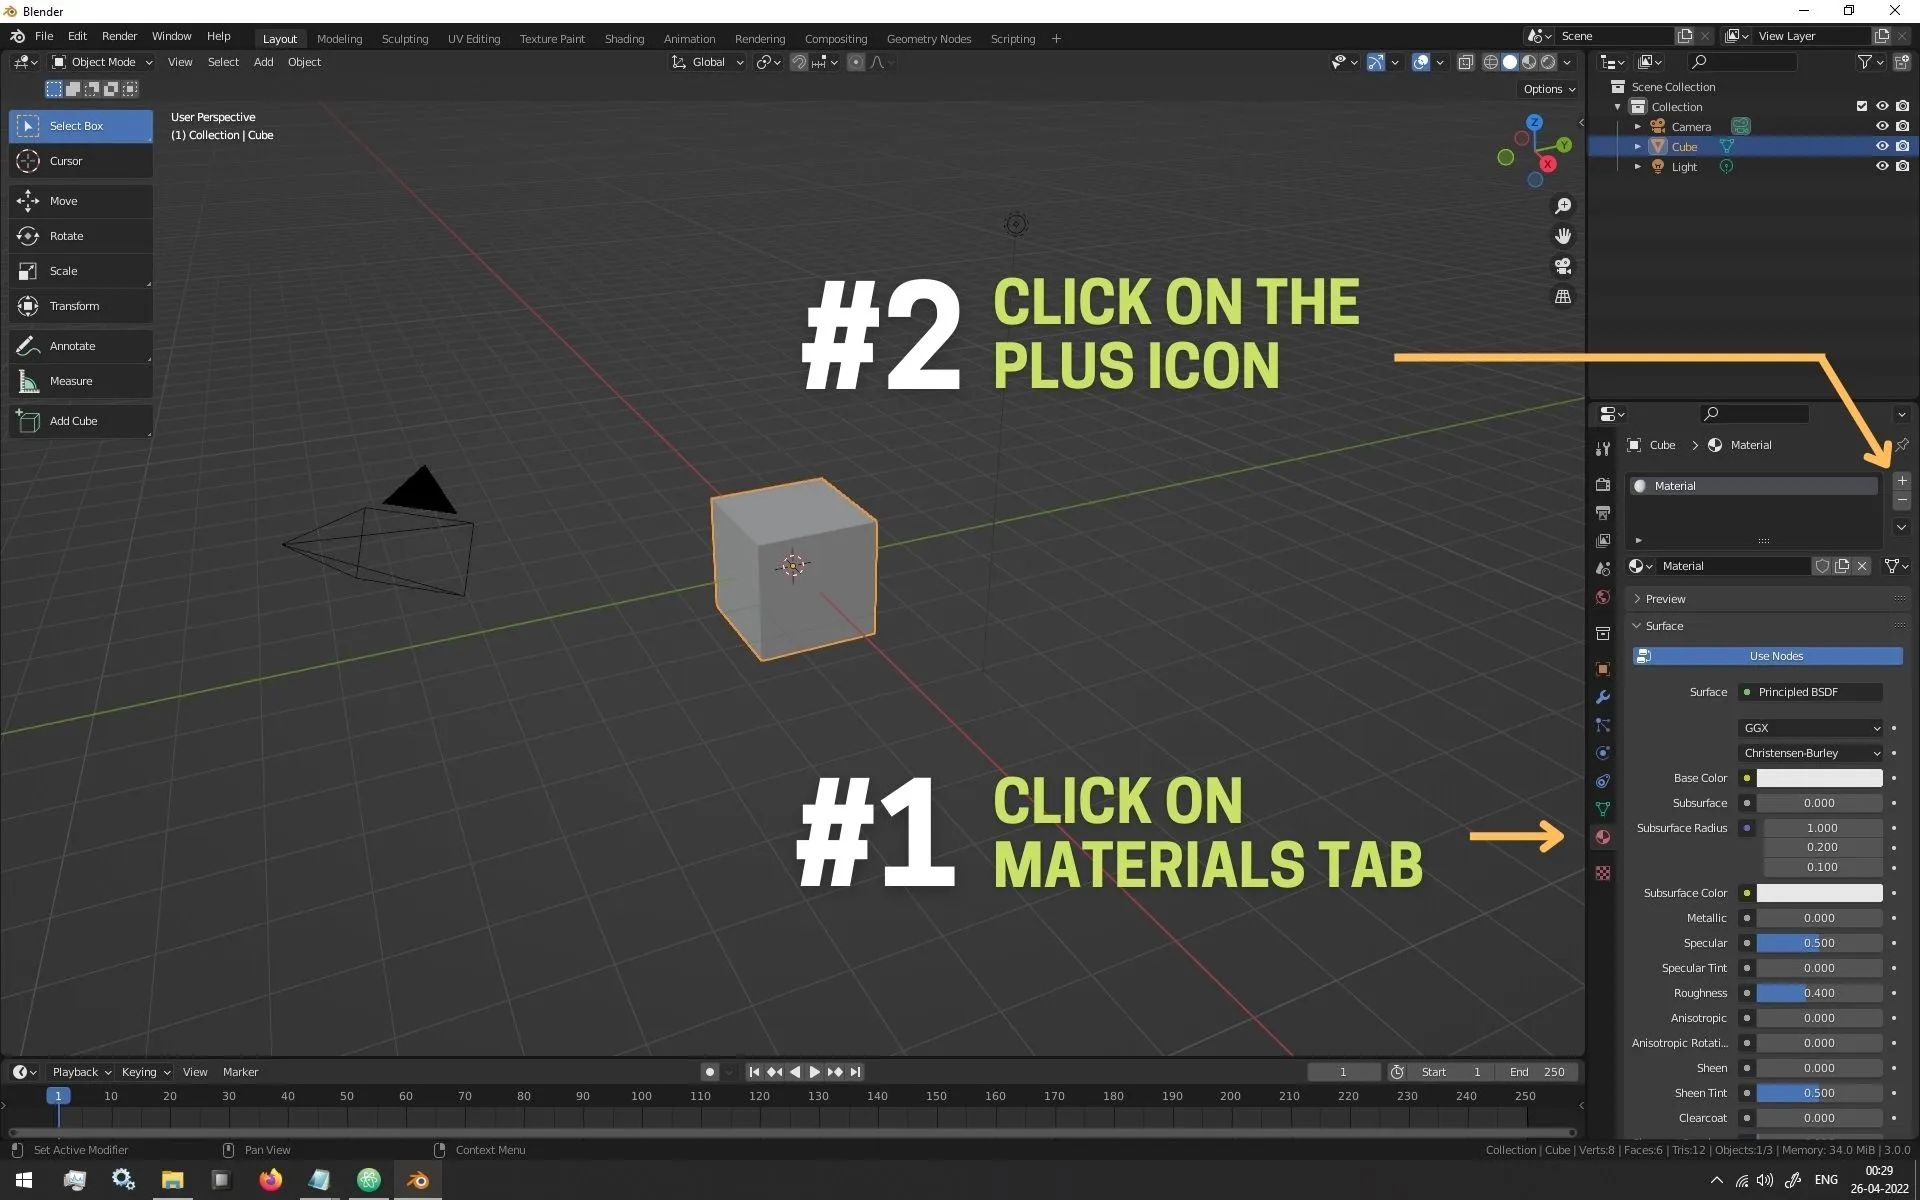
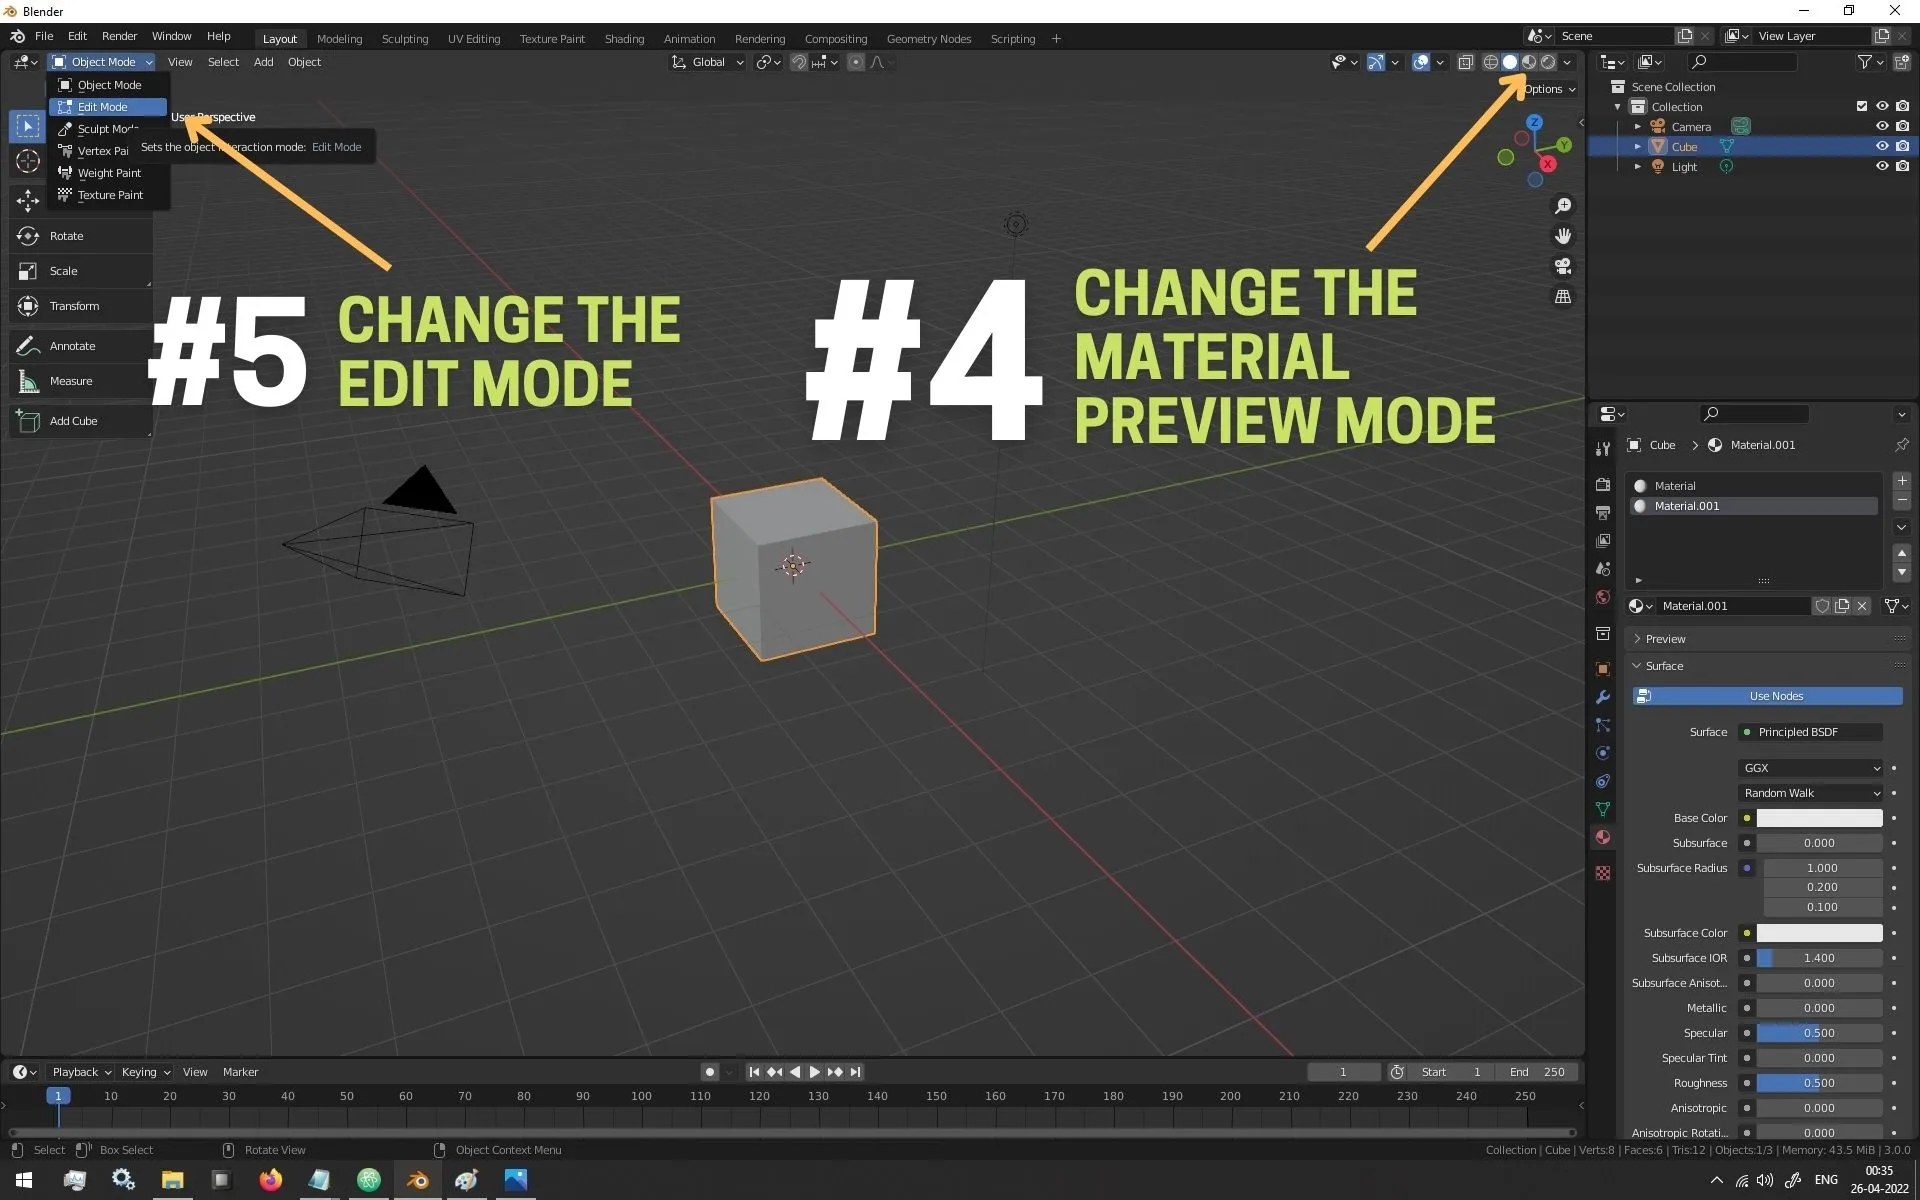
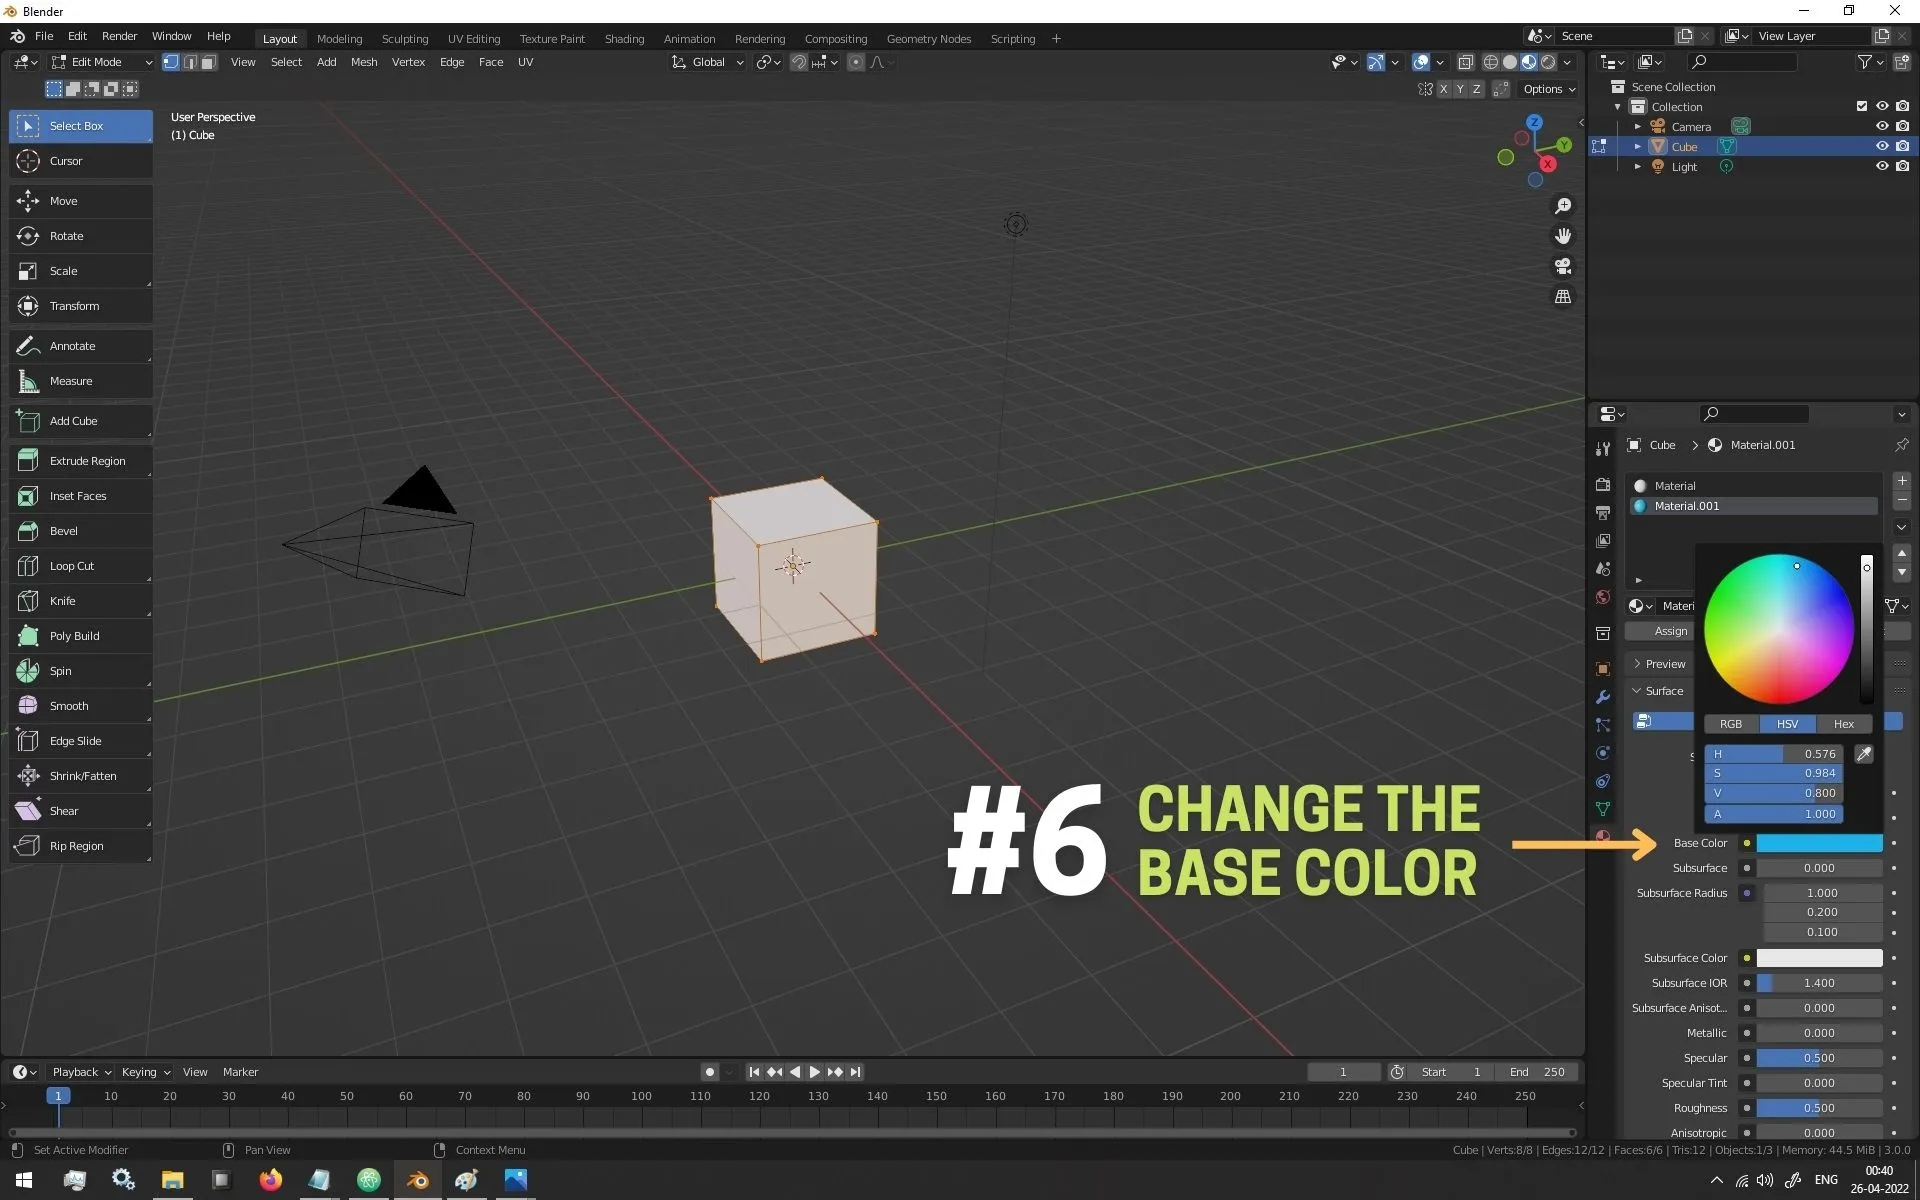
Make sure that it’s a Principled BSDF Material.
It doesn’t need to be Principled BSDF but if you are new to the whole process of Texturing in Blender
Principled BSDF contains virtually everything that you might need or want.
After that, you can either go to the Shading Tab
or change a Division into Shader Editor as shown in the image below
With that we can now bring in the Albedo Texture into Blender.
4 Ways To Bring in Albedo Textures into Blender Shader Editor
Method 1 :
If you are in the Shading Tab, You can Search for the texture in the panel on the right and drag and drop it in the Shader Editor
Method 2 :
Click anywhere in the Shader Editor and press your assigned key for the Menu Search or Press F3 (Default in Blender 3.0 and above)
Type in Image Texture and press enter and then click wherever you want to place the new node in the shader canvas.
Now Press Open in the node you placed, browse for your image and open the image
Method 3 :
Hover Over the Shader Editor and Press Shift + A to open the context menu (Default in Blender 3.0 and above)
In The Context Menu, click on Texture -> Image Texture and then click wherever you want to place the new node in the shader canvas.
Now Press Open in the node you placed, browse for your image and open the image
Method 4 :
Drag and Drop it directly from your File Explorer in the Shader Editor
So choose any one of these 4 Methods and bring in your Albedo Texture into Blender.
With that done, now you will have two nodes in your Shader Editor
one being the Principled BSDF Node, while the other being the Image Texture Node.
Now currently this will do nothing as we have not connected the Albedo Texture’s Output Channel to an input channel in the Principled BSDF node.
We want to connect our Albedo Texture into the input channel that is labeled as Base Color in Principled BSDF
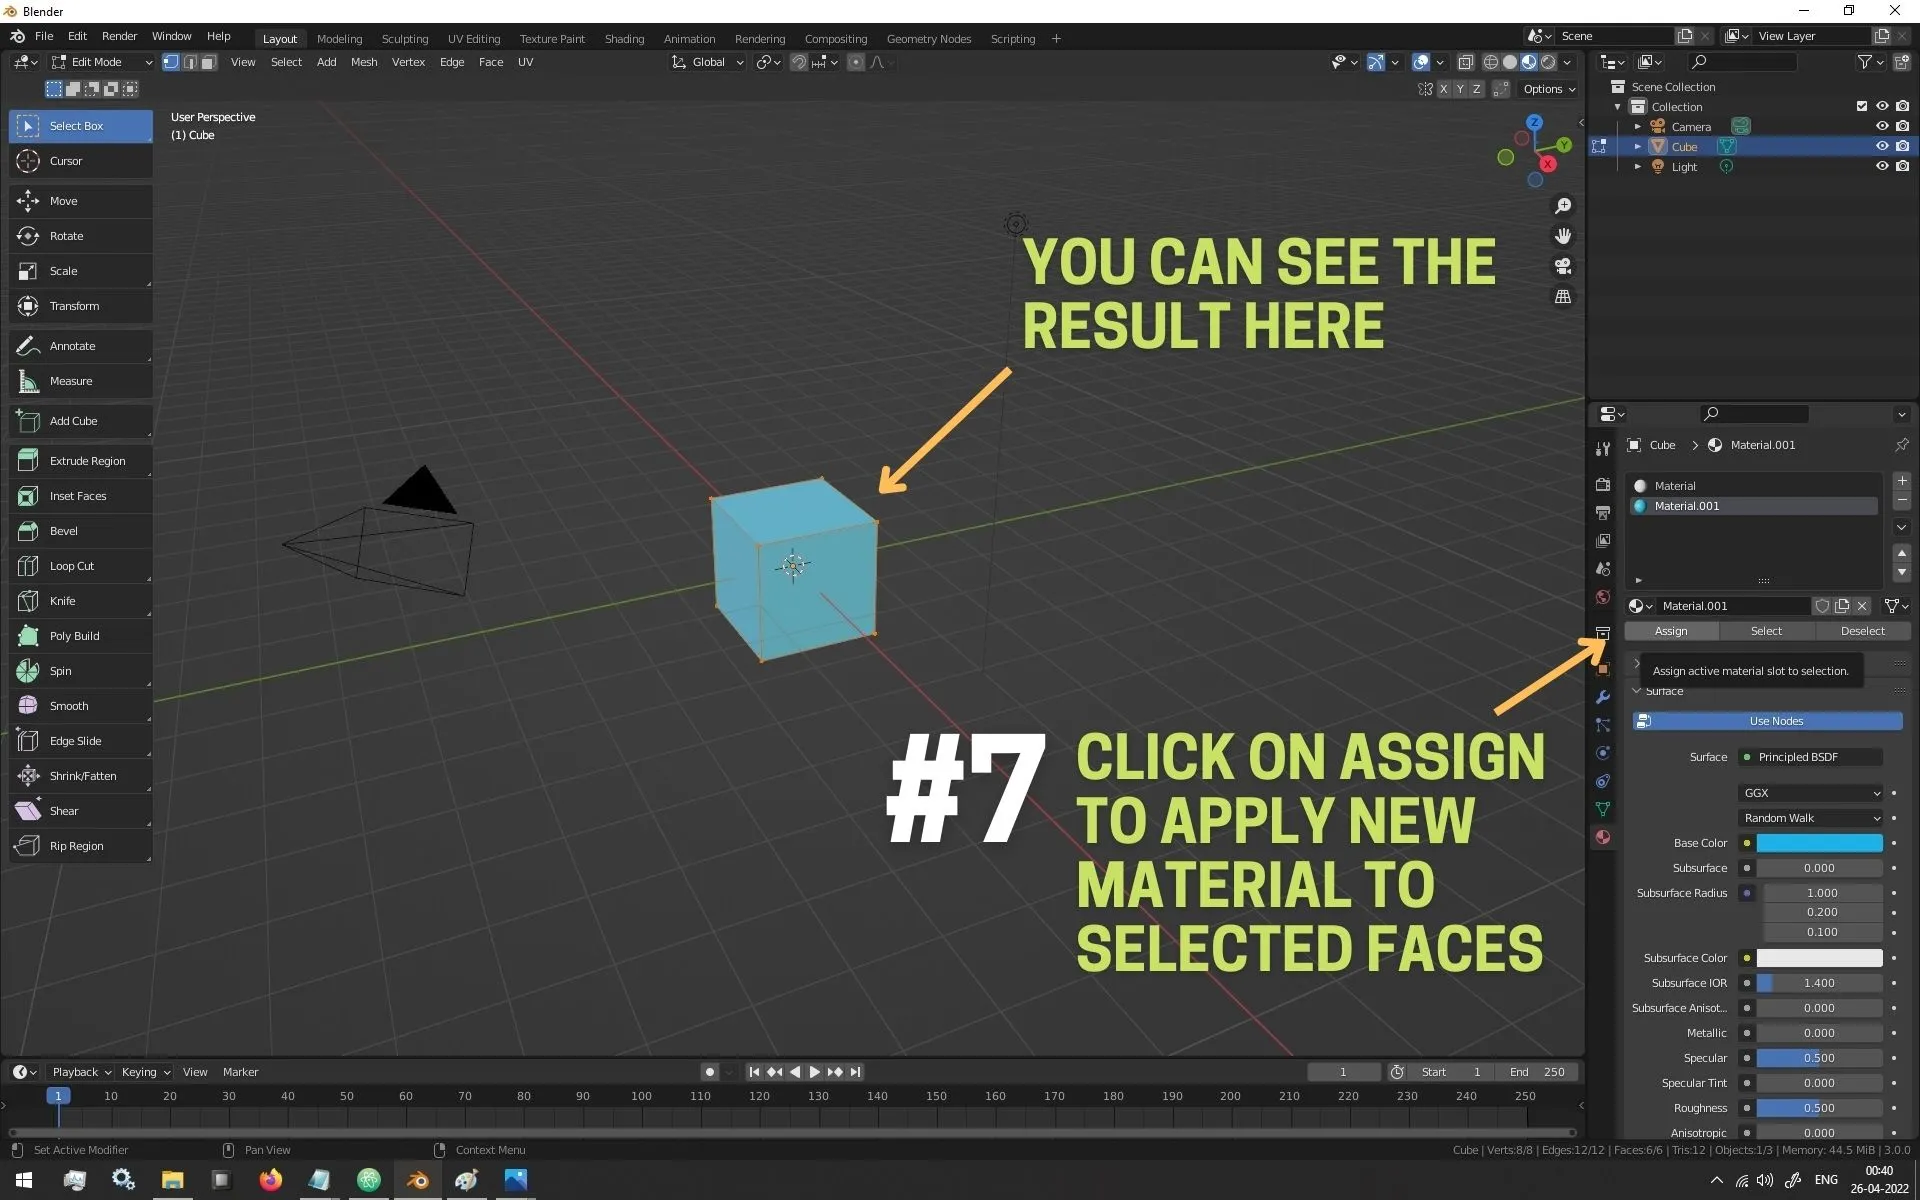
So just click and drag from the output channel of the Albedo Texture and drop it in the Base Color Channel, as shown in the image below.
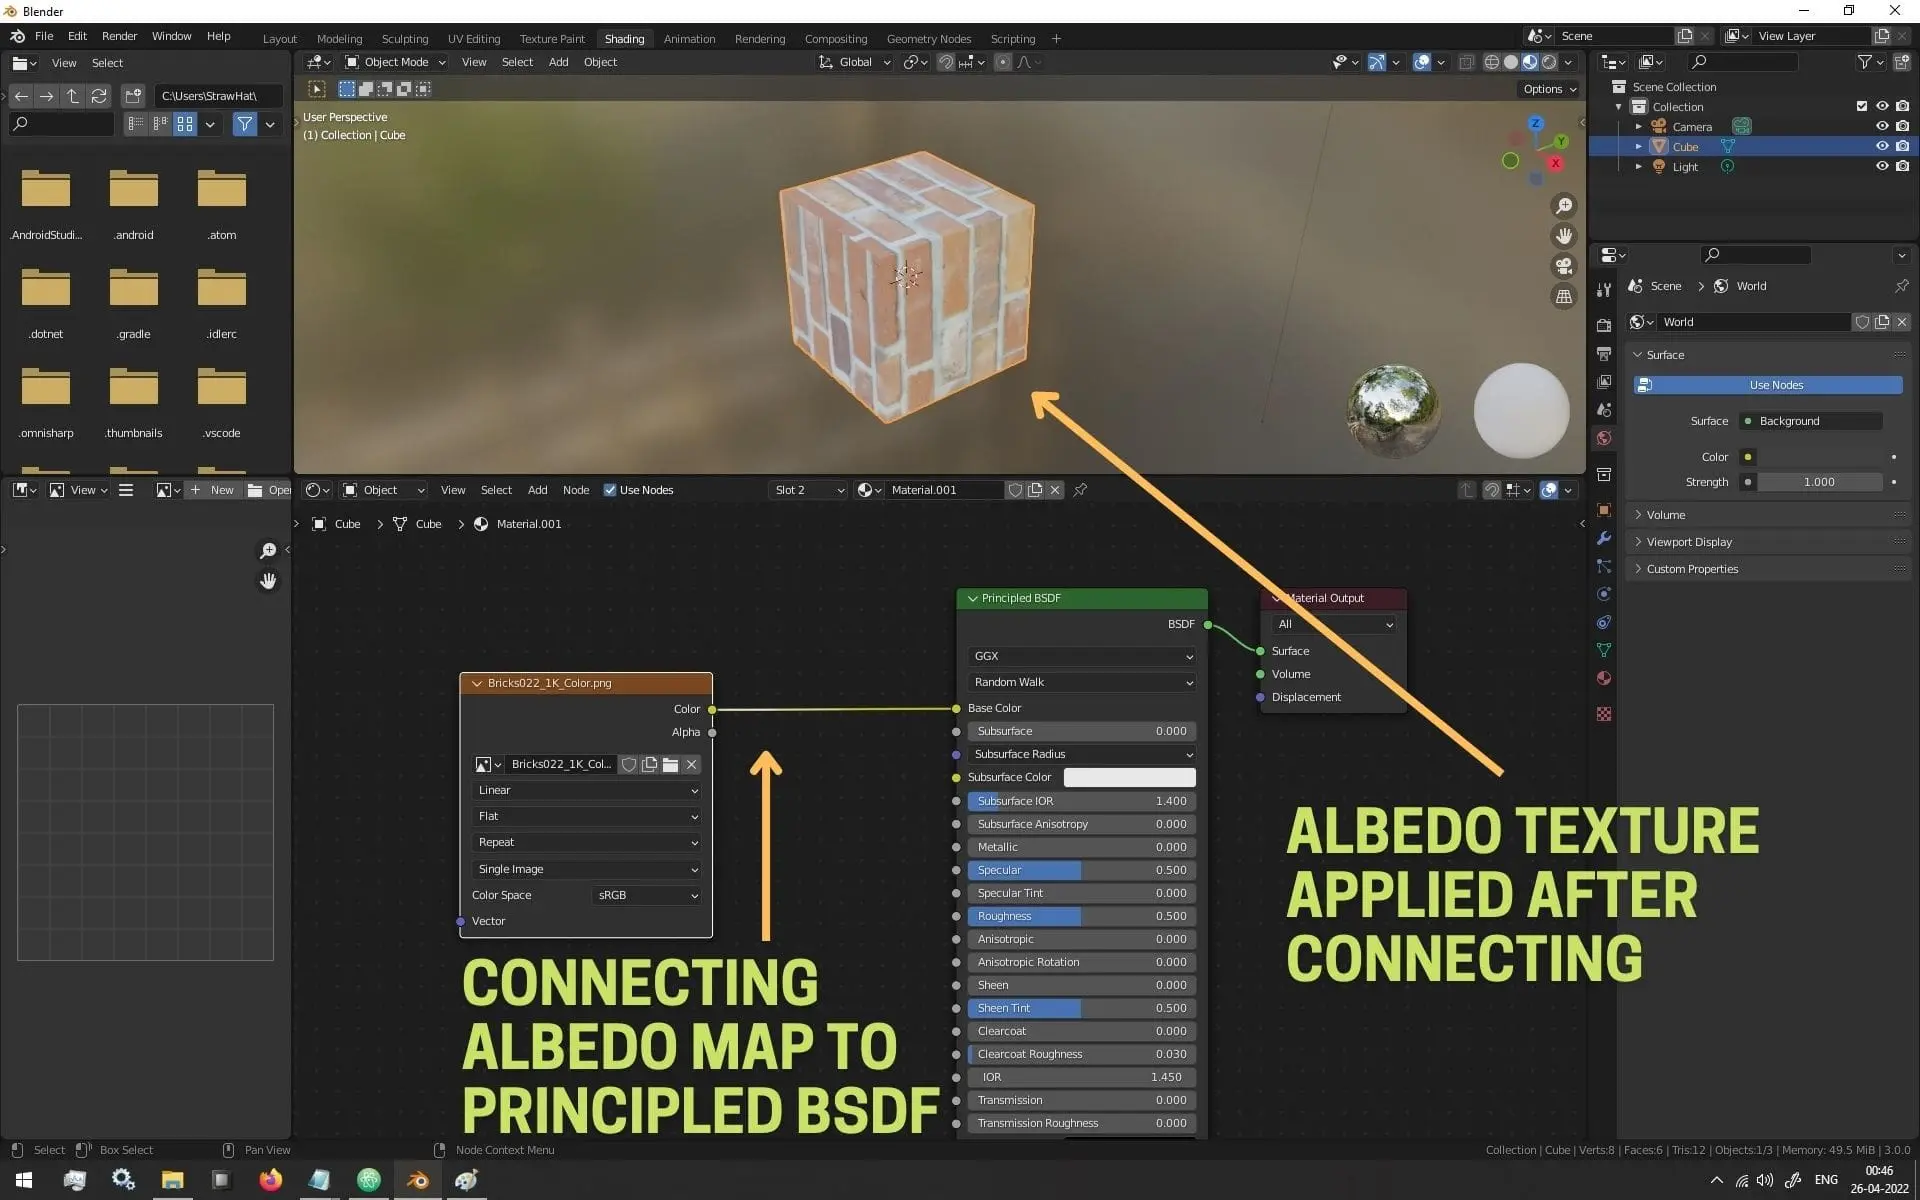
On doing this you will instantly see the change being reflected on your 3D Model.
If you don’t see anything make sure your 3D View Division is set to Material Preview or Rendered View
Conclusion
Well folks, that does it for this article.
i hope that this information will be helpful to you.
Share this post and follow us on Social Media platforms if you think our content is great, so that you never lose the source of something you love.
If you like the content do go through the various articles in 3D Art Basics With Blender Series that this post is a part of and also go through the other series we have on Bite Sized Tech.
Also we have a YouTube Channel : Bite Sized Tech where we upload Informational Videos and Tutorials like this regularly. So, if you are interested do subscribe and go through our Uploads and Playlists.
Follow Us On Social Media
Goodbye for now,
This is your host VP
Signing off.
Articles In Basics Of 3D Art With Blender Series
Overviewing The Basics Of 3D Art | 3D Modeling, UV Unwrapping, Texturing & Rendering
Color / Albedo Map / Diffuse Map
Specular Map / Reflectivity Map (Not Uploaded Yet)
Metalness Map (Not Uploaded Yet)
Gloss Map / Roughness Map (Not Uploaded Yet)
Displacement Map / Height Map (Not Uploaded Yet)
Ambient Occlusion i.e AO Map (Not Uploaded Yet)
Channel Mask Map (Not Uploaded Yet)
Articles In Blender Tutorials Series
How To Make a 3D Model Or an Array of 3D Model Follow A Curve