Now most of us don’t have really high end computers with top of line processors and graphic cards
which would make our lives as Game Developers a lot easier.
Instead, what we have are run off the mill computer parts
that will find it really difficult to push out steady fps (Frames per Second)
or flat out freeze when we are trying to test and develop our games.
Now this can be a real painful experience and believe me,
it can suck out whatever passion you had to develop your game.
So, to stop that from happening to you,
i have come up with 5 Ways using which you will be able to develop games on a low spec computer
if you are developing games using the Unity Game Engine.
On top of that, these 5 Ways make your experience as a Unity Game Developer far better.
So, if you are a Unity Game Developer go through this whole article as i can be sure that these 5 Ways will be really helpful to you.
Now, let’s dive directly into the it.
This Post is Part of : How To Make A Game Series where i’ll be showing you how to become a game developer and will be going over the basics of Game Development, Step by Step, using the Unity Game Engine and C# Scripting Language to script the Game Logic.
If you are new to Game Development or Programming in general you should definitely go through this Unity Tutorials article series as it will set give you a kick-start towards becoming an exceptional Unity 2D or 3D Video Game Developer.
If you have not read the article on Intro To Game Development
in which i introduce to you the Art of Game Development, Roles in Game Development and your Recipe for Success as a Game Developer
please go ahead and read that article next,
as i can’t emphasize how necessary it is and how helpful it will be for you to have the right mindset,
which is required to learn how to make a game and become an exceptional Game Developer.

#1 – Set Auto Generate Lighting To Off
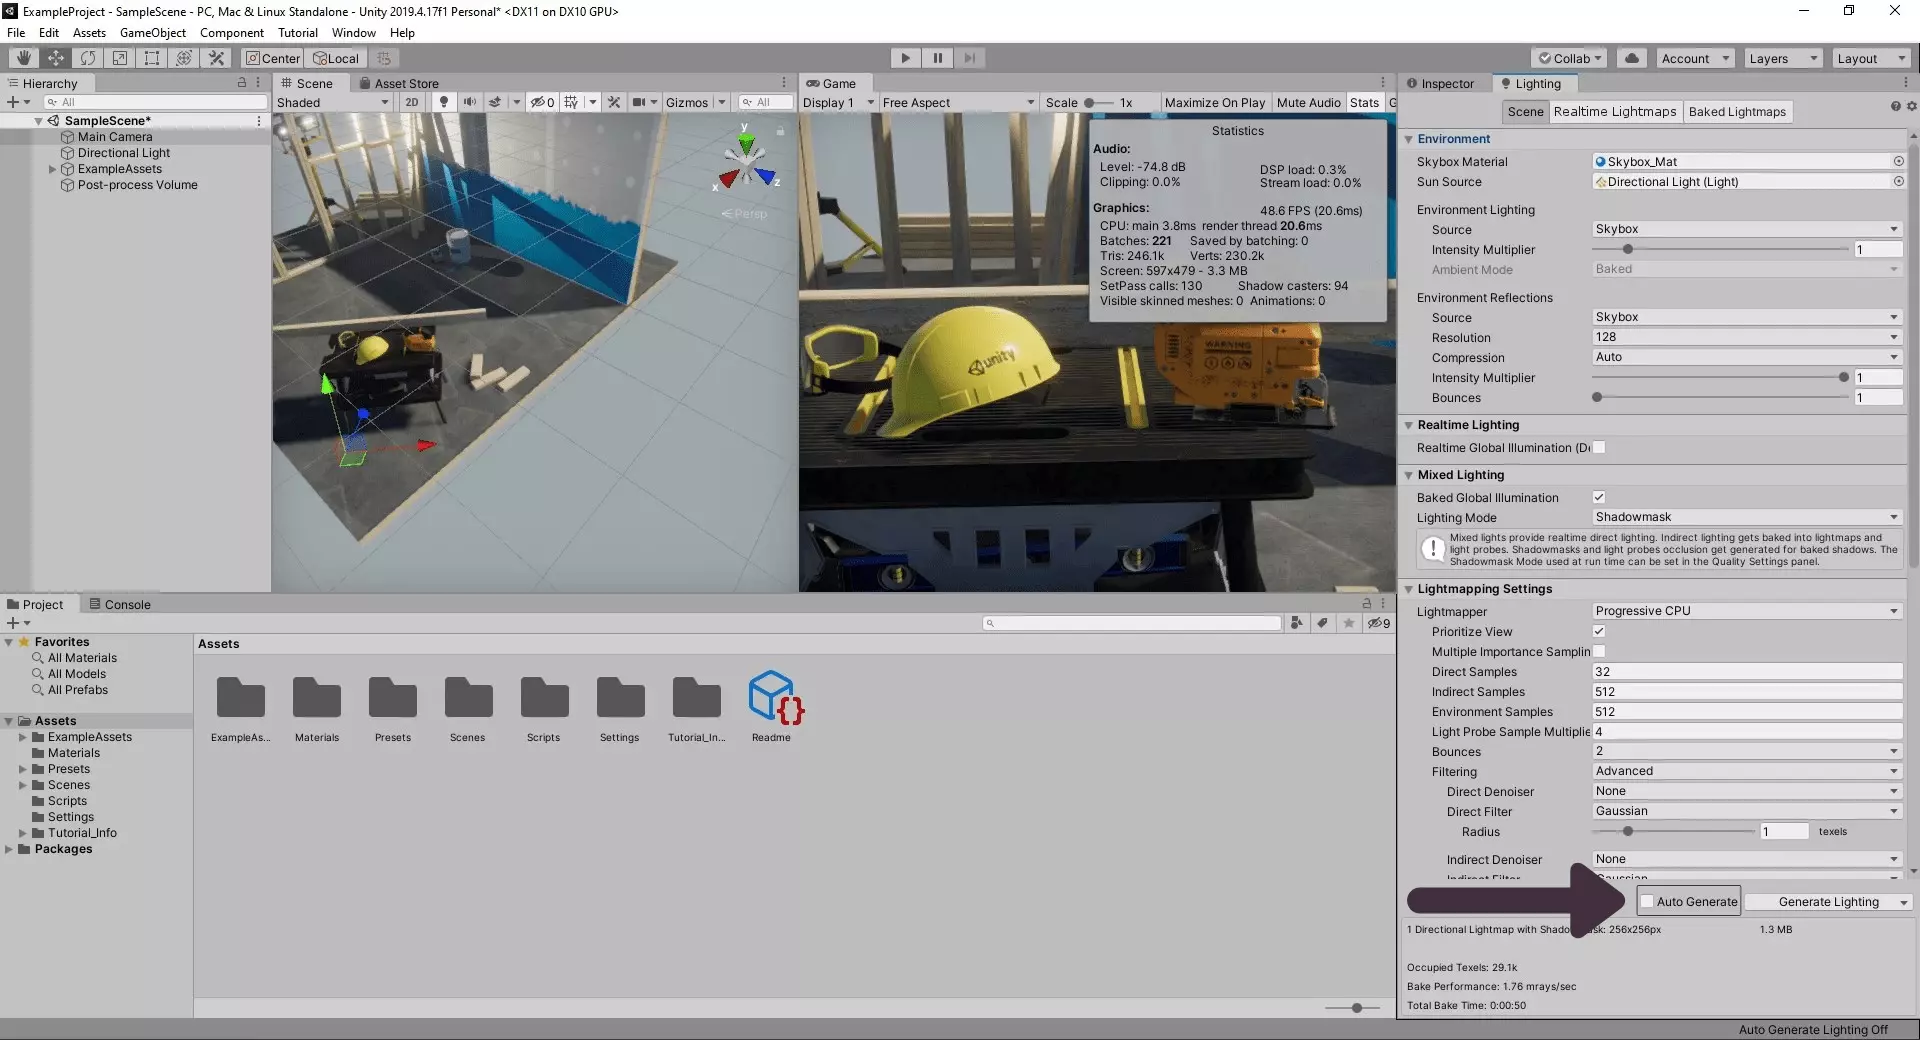
The First is that, as soon as you start your unity project for the first time set auto generate lighting to off.
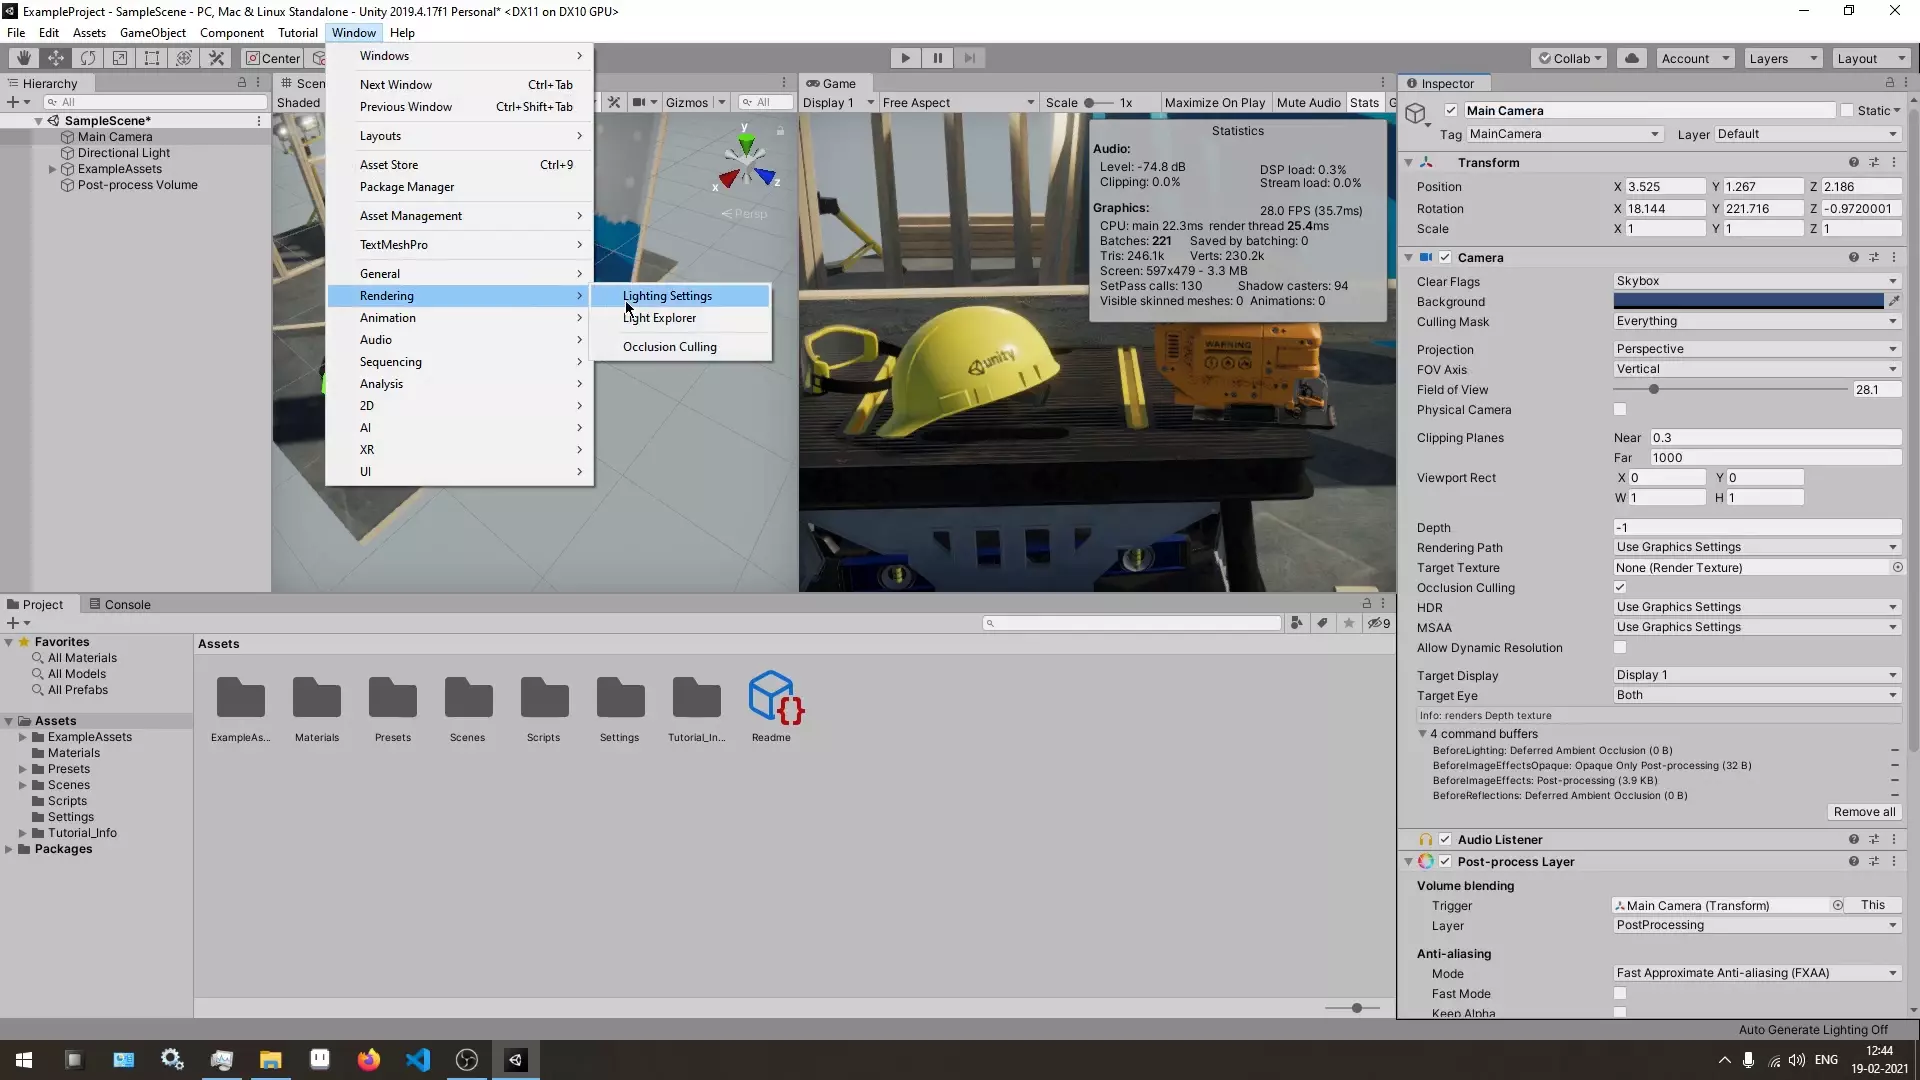
You can do this by going to the Lighting tab and then unchecking the toggle box that says Auto Generate as show in the image below.
If the lighting tab is not already open
you can go to Window -> Rendering in the Menu Bar
and click on Lighting Settings to open it as show in the image below.
When Auto Generate Lighting is set to ON,
whenever you make any little changes in your scene
Unity will bake the lighting again to show you the correct shadows and lighting information.
In spite of this being an awesome feature,
this instantaneous change in lighting information comes at a cost which low end computers will not be able to handle very well.
So, Setting Auto Generate Lighting to OFF will let you make changes to the scene without your computer chugging and freezing
and then when you are satisfied with the changes that you made to your unity scene,
you can click on Generate Lighting to generate lighting information manually.
You can find the Generate Lighting button beside the Auto Generate Checkbox in the Lighting Tab.
#2 – Use a Light-Weight Code Editor Like VS Code
Now to the second point, which is to set your default editor to something like VS Code
or any other light weight code editor of your choice.
Setting your Default Editor for Unity to something like VS Code will allow you to smoothly switch between Unity and your Code
which is really important as you need to keep on testing your code in Unity continuously.
This might not seem to be a huge problem
but if it takes a couple of seconds every time you want to switch between Unity and your Code Editor
it will start getting annoying pretty fast and make your a bit frustrated.
You can do this by going to Edit -> Preferences in the Menu Bar as shown in the image below.
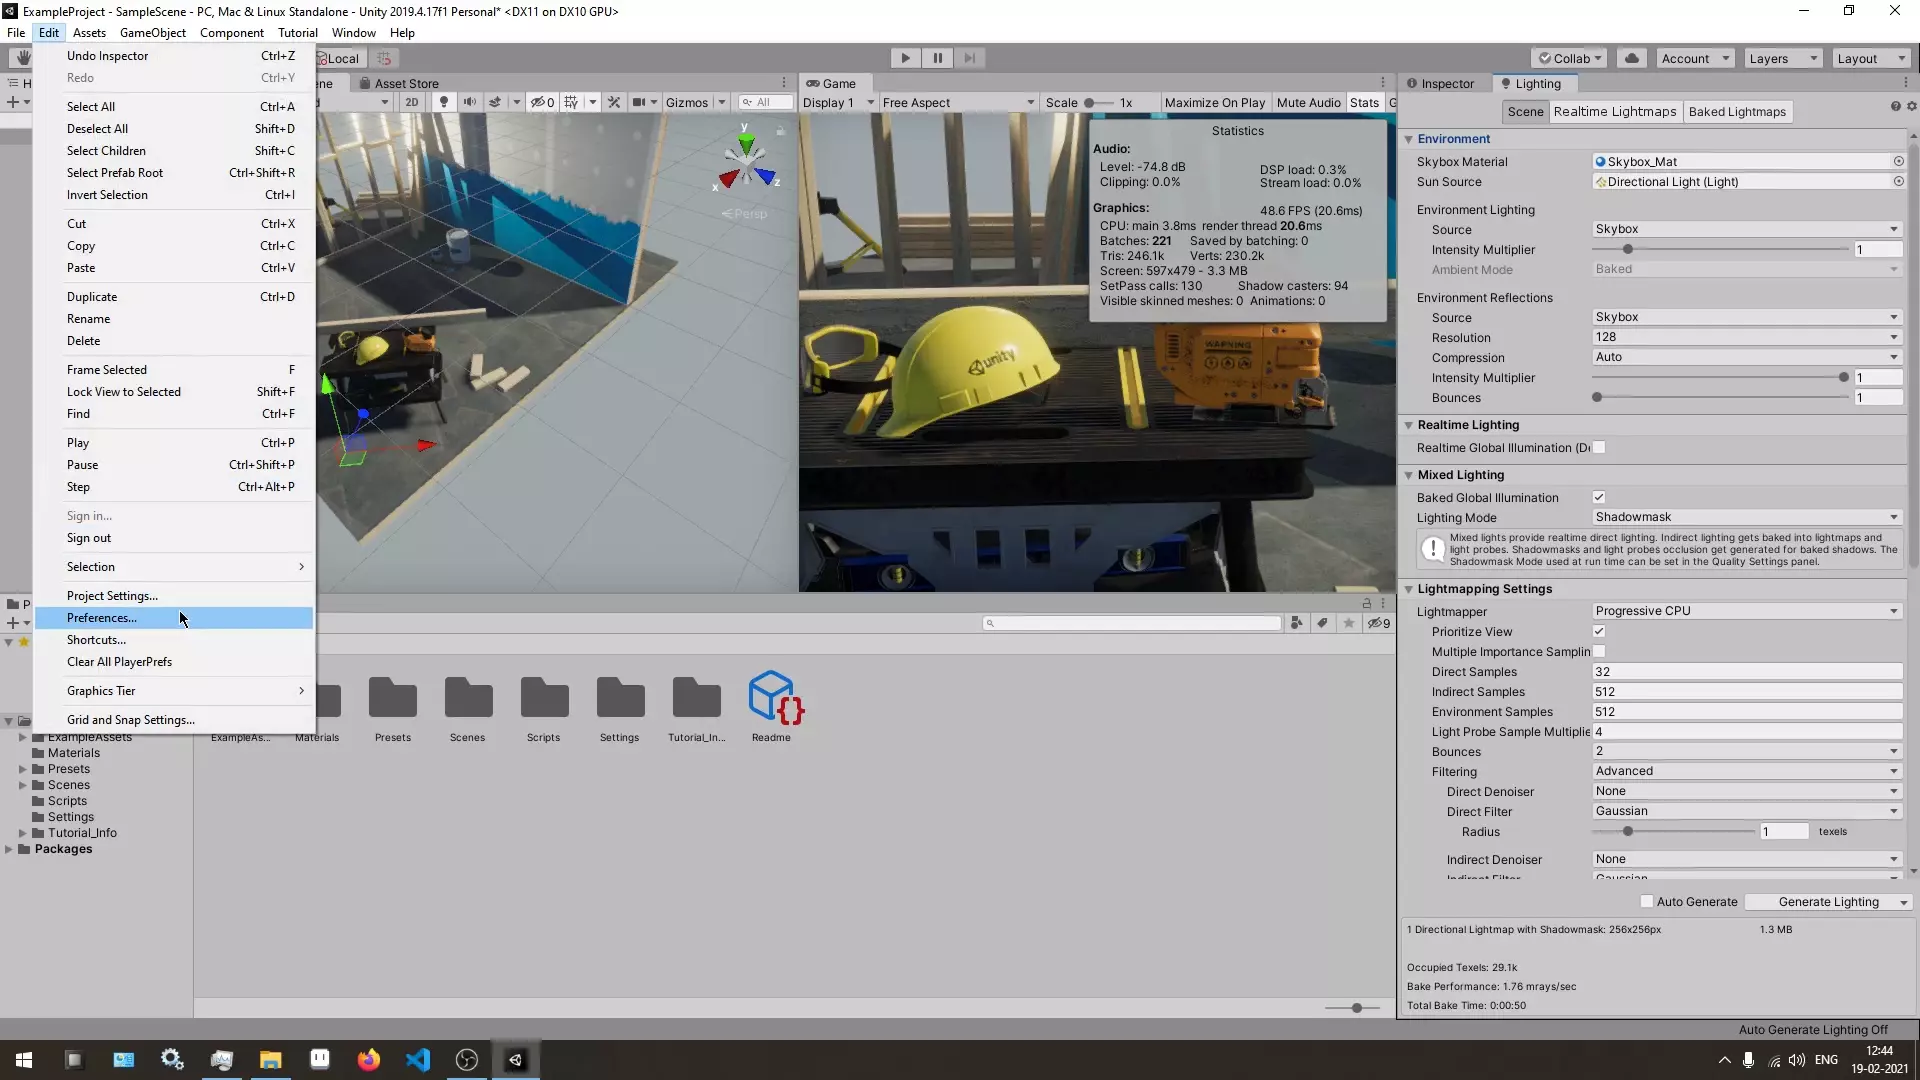
Then in the Preferences Window that just opened, click on External Tools.
This is where you will find External Script Editor Drop-Down Menu as show in the image below.
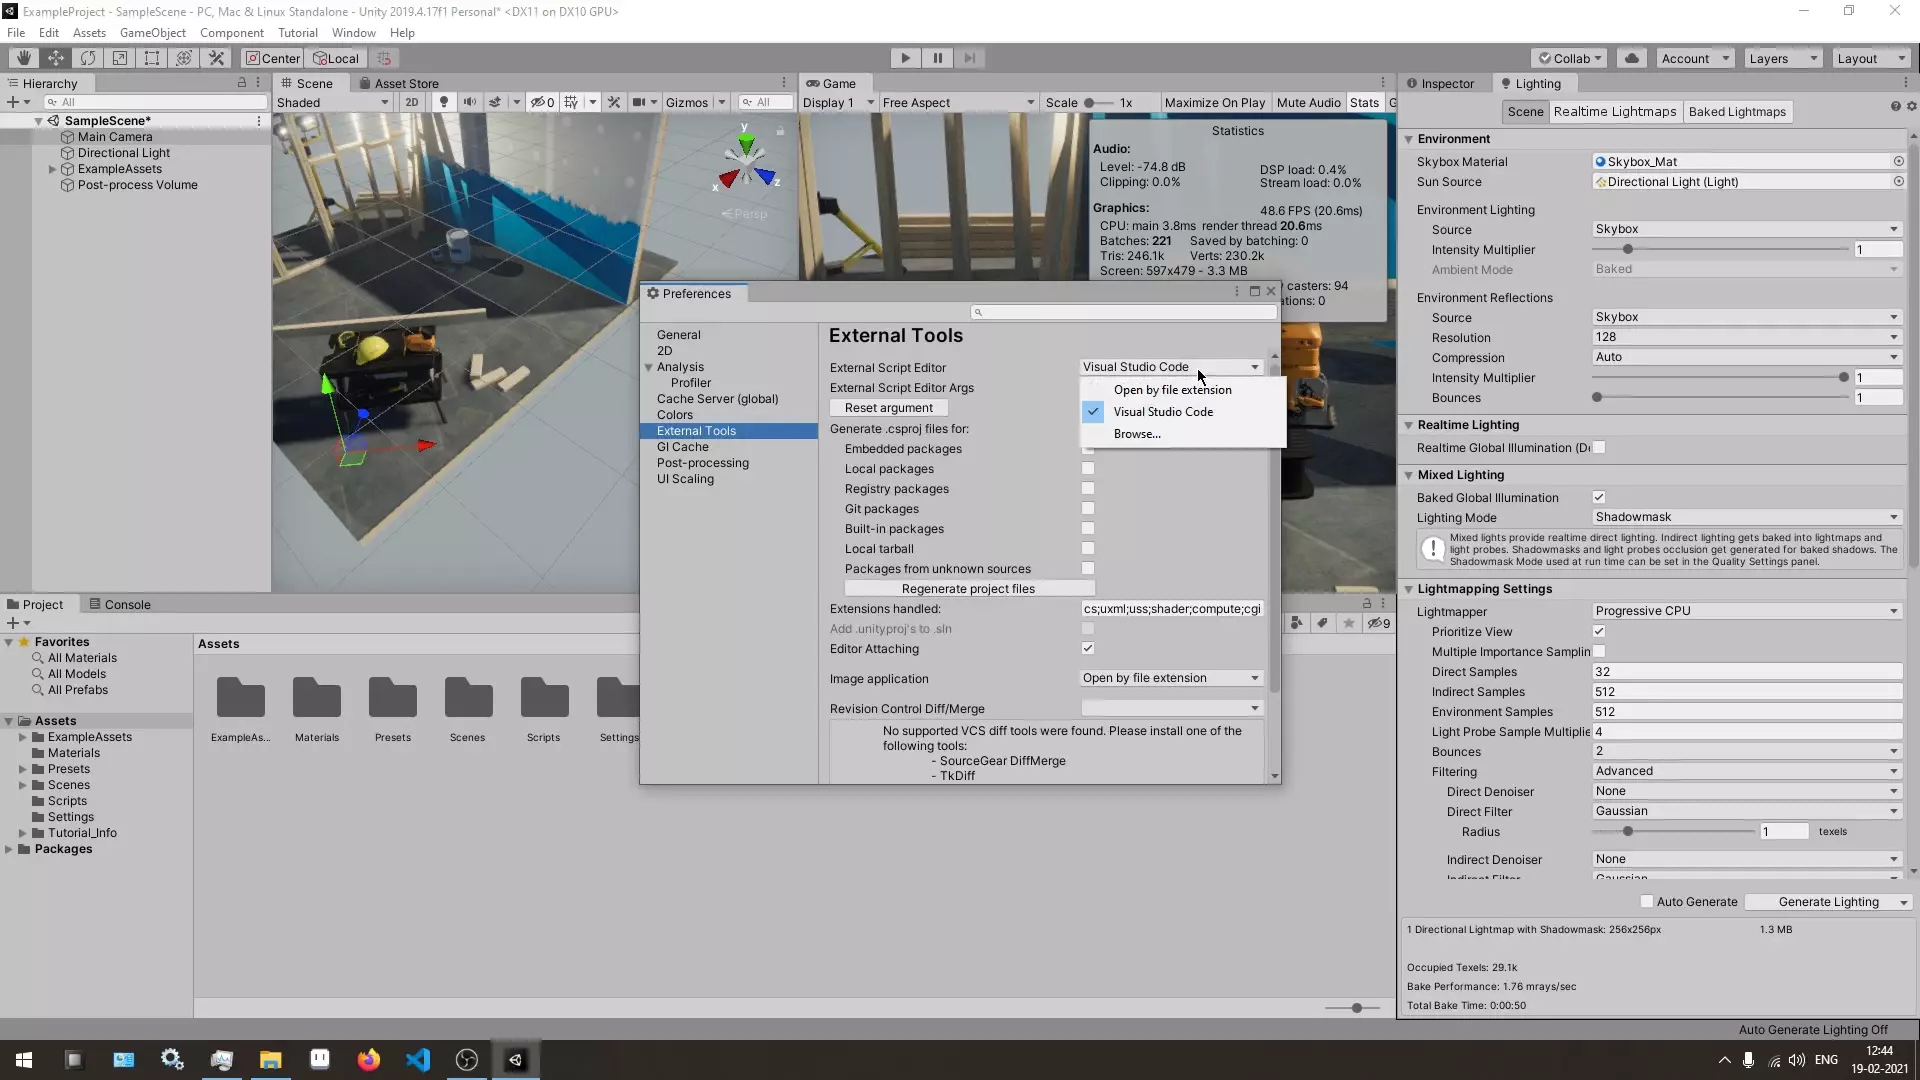
In this Drop-Down Menu, you can select whatever Code Editor you want as your Default Editor
and if your Code Editor is not showing up in the list you can Browse and Select your Code Editor.
If you want to know more about your Code Editor Options,
you can take a look at this article on Game Development Softwares
in which i have over-viewed the Types of Softwares that you will need for each section of Game Development
and have also given multiple Free & Paid options for Softwares in each section.
This article will set you up with everything you need to get started as a Game Developer.
#3 – Lower Unity Editor’s Graphics Quality
With that done, now lets move on to the Third point, which is to lower your Unity Editor’s Graphics Quality
so that you at least have a tolerable Game Development experience.
Doing this will not change how great your game will look like when you build your game out.
This setting only affects the graphics quality in the unity editor you are working with.
Also you can change this anytime you want, so don’t worry about it!
You can change this setting by going to Edit -> Project Settings as in the image below.
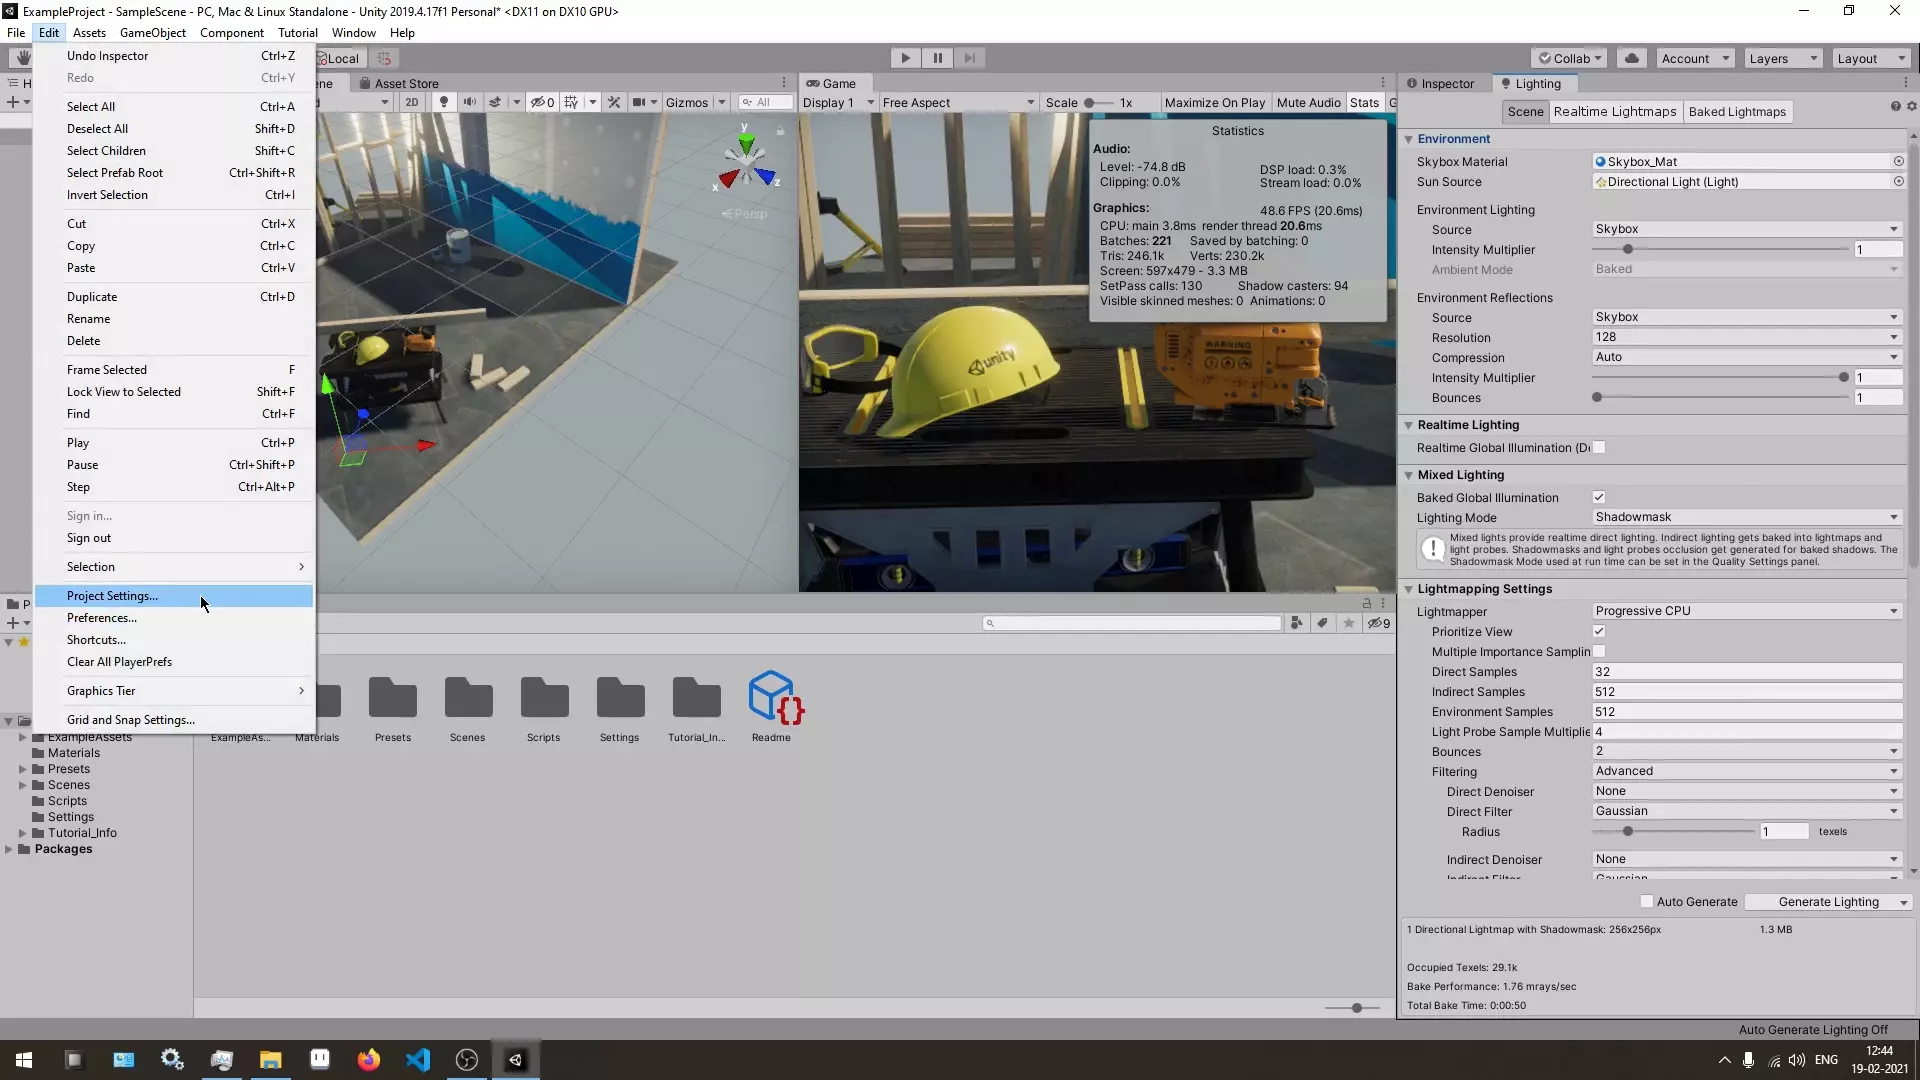
Then in the Projects Setting Window click on the Quality section
and then select Very Low by clicking on it.
If you change this setting after you have pressed the Play button in the Unity Editor,
you will see instantly that your game will start looking a bit rough around the edges.
This is the consequence of setting the graphics quality to a lower setting
but this will allow you to work on your game ideas smoothly
and set up your game scene without all the stuttering that your low end computer will get at high settings.
And then when you want to test what your game will actually look like at high settings
you can either change the settings here again if you want to test it in the Unity Editor
or build your project out and play it as a standalone game if you really want to check out your game from your player’s perspective.
In the images below, you can see the difference in the fps between both the settings.
Ultra Graphics Quality
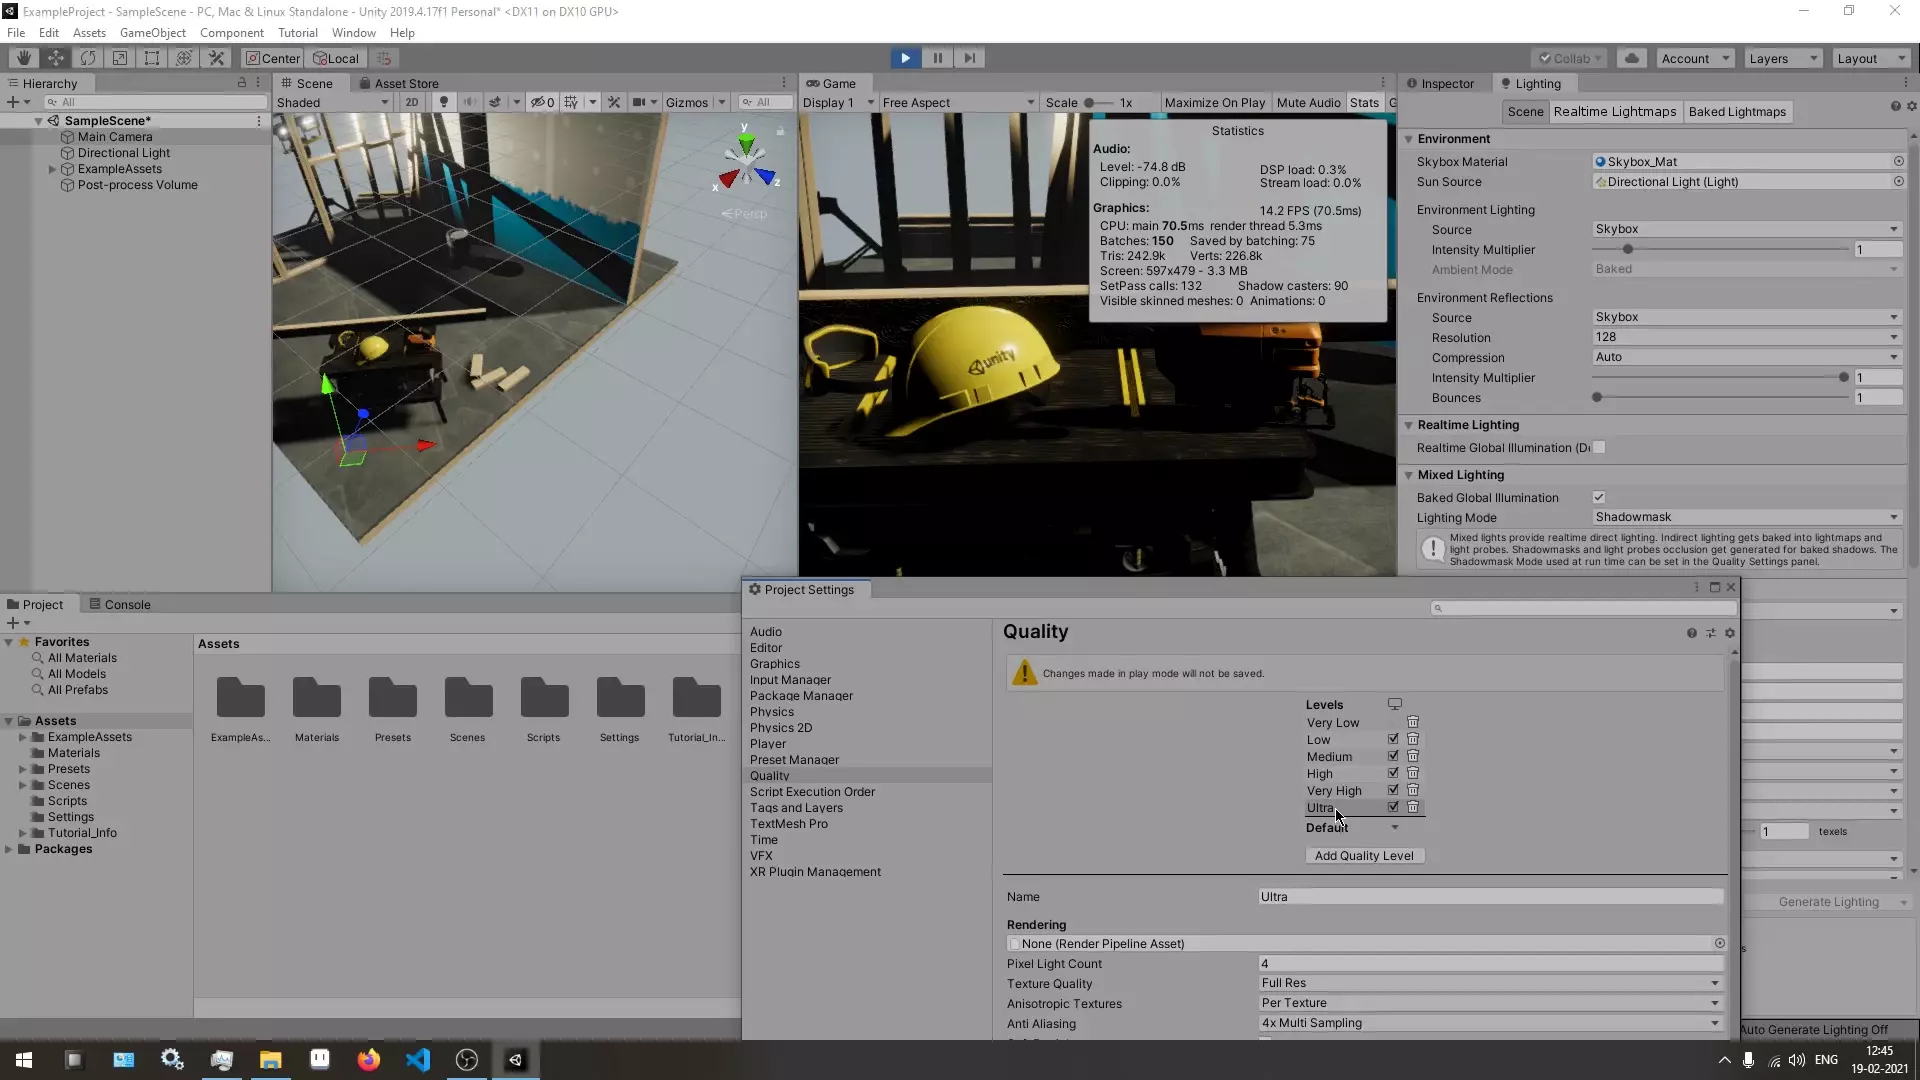
Very Low Graphics Quality

As you can see, the difference in fps between Ultra and Very Low on the PC i did this test on is almost twice.
Fun Fact : This PC was running 2nd Gen Intel 2100 with no dedicated graphics card and 4 GB of RAM.
#4 – Always Keep Task Manager Open On The Side
Now to the 4th point which does not have anything directly to do with unity but as you are on a low spec computer,
you should always have your Task Manager open on the side to monitor your CPU and RAM usage
and close the applications that you do not need currently or are taking too much processing power.
This will also allow you to see if unity has become not responding for some reason
so that you can stop wasting your time and end it’s process and restart unity.
This will happen a lot to you when you are developing games
so it’s great to always have the task manager open on the side all the time.
#5 Stick To Developing 2D Games
Now moving forward to the last point, which is that,
if you have 4 GB of RAM or Less than that on your computer
then i would suggest that you work on 2D Games.
I suggest against trying to develop 3D Games because on a low spec computer
you will have a terrible experience when trying to develop a quality 3D Game.
Now if you’re hell bent on developing a 3D Game
then i would suggest that you upgrade your RAM to at least 8 GB.
Latest DDR5 & DDR4 RAM Recommendations
Here is a list of some good DDR5 and DDR4 ram stick that you might find useful.
Recommended RAMs may either be in Single Stick and Dual Stick Config
i.e. for example, 32 GB Kit can either be (16GB x 2 Sticks) or (32GB x 1 Stick)
so make sure to check that according to your needs.
If you don’t know anything about RAM and want to know which specifications are important when Buying RAM
then take a look at this – RAM Buying & Usage Guide | DRAM, SDRAM, DDR RAM, Memory | RAM Overclocking (O.C.)
This article is more than 5000 words long and i go quite in depth regarding
- Basics of RAM
- Various Types of RAM based on RAM Generation, Form-Factor and Usage
- Important Specifications and Standards for RAM
- Understanding Seller Listings on Amazon, New Egg, etc.
- Setting up RAM correctly to Maximize Performance
- and more
which will be extremely helpful to you if you want to buy RAM.
We receive Commission for any Qualified Purchases done through our Affiliate Links.
Affiliate Links use ‘cookies’ to correctly give credit to affiliates
but Privacy Regulations like GDPR require Explicit User Consent before cookies can be placed on User’s Computer
Thus, User Consent is required before we can show Affiliate Links to you.
Turn On Advertising Cookies using the floating cookie setting button or the cookie banner,
if Affiliate Links are not visible!
I’ll keep Updating the Affiliate Links below! Apologies if any of them don’t work :p
DDR5 RAM
DDR4 RAM
Conclusion
Well folks, i hope that this information will be helpful to you.
Share this post and follow us on Social Media platforms if you think our content is great, so that you never lose the source of something you love.
If you like the content do go through the various articles in How To Make A Game Series that this post is a part of and also go through the other series we have on Bite Sized Tech.
Also we have a YouTube Channel : Bite Sized Tech where we upload Informational Videos and Tutorials like this regularly. So, if you are interested do subscribe and go through our Uploads and Playlists.
Follow Us On Social Media
Goodbye for now,
This is your host VP
Signing off.
Articles In How To Make A Game Series
Game Development Softwares (Game Engines, 2D Art, 3D Art, Code Editor, DAW)
Methods | Part 1 – Basics of Methods
Methods | Part 2 – Multiple, Required & Optional Parameters + Named Arguments
Methods | Part 3 – Overload Resolution
Methods | Part 4 – In, Ref and Out Keywords